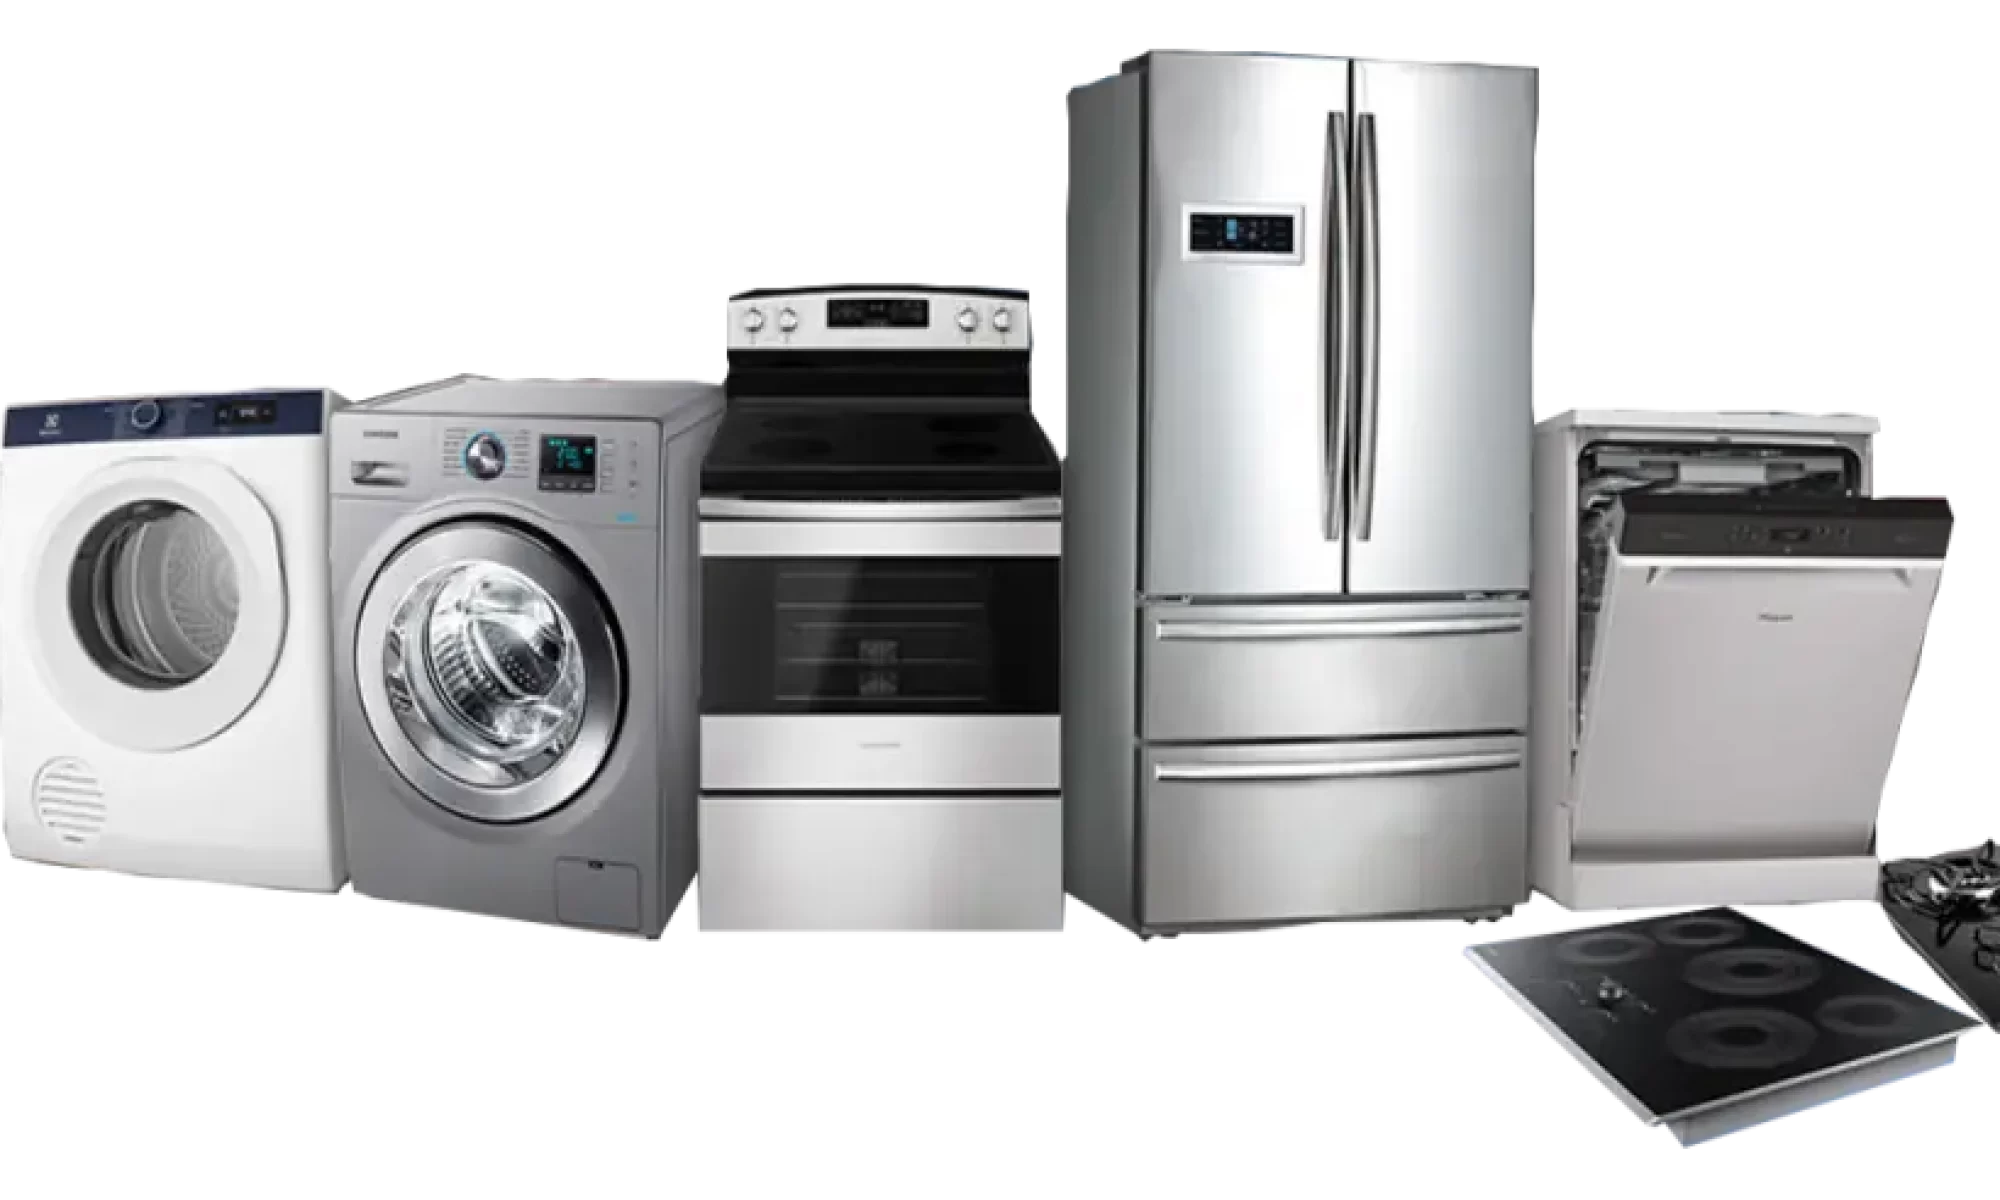
Dryer Repair
FREE Service Call with any Repair.
Licensed Experience in Service
MAAR24 Appliance Repair offers reliable, same day Electric Dryer Repair ! Residential appliance ONLY. Our customer support center is open 7 days a week to assist you in booking a service call.Call NOW 647-303-4997


Professional dryer fixers will quickly restore your appliance
We care to keep your household appliances in order. This is a well-known fact that after detection of any malfunctions and suddenly popped up faults with the particular device, it is better to eliminate them in the shortest possible time. Those measures would avoid more heavy complications that may occur. Concerning to the devices, our professional repair company is ready to offer the best dryer fixing, stove repair, washer fix, and fridge maintenance solutions in Ontario that will meet all the needs of our potential customers. Our certified specialists can quickly and efficiently remove the technical problems and repair a large number of units often used in modern households without wasting the valuable time of our clients.
Exceptional dryer fixers. A dryer is among the most needed and used household devices. When the dryer stops drying the clothes, it could be an indicator of various faults preventing it from normal work. Failure to comply with the proper working conditions and correct installation may cause a significant number of malfunctions. The most typical of them are considered the ones listed below:
- according to the indicators, the drum is spinning producing no heat and the clothes remain wet;
- the dryer is too hot and does not change the temperature;
- the drum doesn’t spin when the motor runs;
- not all the water is drained after the cycle is over;
- heating element fault.
To eliminate these issues and ensure the smooth operation, the device should be meticulously inspected by our skilled technicians and certified electricians. Our experienced dryer technicians will rapidly detect the exact trouble causing a breakdown and fix it.
We will fix your dryer at any time. Our appliance fixing company is ready to offer exceptional technical support and information help for you. We have the potential and knowledge to provide regular maintenance and expert fixing services at an inexpensive rate. Mobile equipment enables our repairmen to rapidly reach the destination point and cover clients’ needs at their location. Nevertheless, in case of heavy maintenance demanded we can deliver your non-operational dryer for fixing at our repair facility in your town. Standards of top-quality and speed repairs are guaranteed on any account. Our customer contacts service works for you 24/7.
Inexpensive and adequate prices to make our service affordable. Our fixing specialists try hard to deliver the most cost-efficient repairs so that everyone could afford it. We have an understanding of the average household income of Canada residents and set down-to-earth prices. Prior to any fixing procedure, you`ll get the comprehensive information about dryer fix estimate with no overcharging for transportation, nighttime/weekend service, low downtime, etc. Also, you`ll be pleasantly surprised with exclusive free on use tips from our handymen having long-term operational experience and nice discounts for loyal partners.
Why Trust and Choose Us for Dryer Repair?
Fully licensed and insured
Over 7 years of experience fixing appliances throughout in Canada
Up to 3 month Warranty
Experienced in all dryer models
Available for same-day service
Same-Day Dryer Repair for Every Canadian Lifestyle
Common Dryer Parts That We Can Replace
- Dryer Bearing Kit
- Dryer Blower
- Dryer Circuit Board
- Dryer Controls
- Dryer Door Catch
- Dryer Door Gaskets
- Dryer Door Switch
- Dryer Drum Bearing
- Dryer Drum Belt
- Dryer Drum Support Rollers
- Dryer Flame Sensor
- Dryer Flexible Duct
- Dryer Fuses
- Dryer Heater Duct
- Dryer Heating Element
- Dryer High-limit Thermostat
- Dryer Idler Pulley
- Dryer Knob, Dial and Button
- Dryer Monitors
- Dryer Motor
- Dryer Springs
- Dryer Timer
- Dryer Vent
Error Codes
Function and Importance:
Dryer error codes serve as a diagnostic tool, helping users and technicians identify the nature of a problem without the need for extensive troubleshooting. Here’s how they work:
Error Detection: Dryers are equipped with sensors, switches, and other components that monitor various aspects of their operation, such as temperature, airflow, and door status.
Code Display: When the dryer detects an issue, it translates the problem into an error code. The code is then displayed on the control panel’s digital display, indicating the specific problem that needs attention.
Diagnosis and Repair: Users can refer to the dryer’s manual or documentation to find the meaning of the error code. Technicians can use these codes to quickly diagnose the problem and perform the necessary repairs.
Common Dryer Error Codes:
Error codes can vary based on the dryer model and manufacturer. However, here are some common error codes and their potential meanings:
E1 or F1: Temperature sensor error. The dryer’s temperature sensor may be faulty or damaged.
E2 or F2: Thermistor error. The thermistor measures temperature and could be malfunctioning.
E3 or F3: Airflow error. There may be an issue with the dryer’s airflow system, such as clogged vents or a faulty blower.
E4 or F4: Door switch error. The dryer’s door switch may not be functioning properly.
E5 or F5: Overheating error. The dryer’s internal temperature is too high, which could be caused by a faulty thermostat or heating element.
E6 or F6: Motor error. The dryer’s motor may be malfunctioning or encountering resistance.
Using Error Codes:
When you encounter an error code on your dryer’s display panel, consider these steps:
Refer to the Manual: Consult your dryer’s user manual or documentation to find a list of error codes and their meanings specific to your dryer model.
Troubleshooting: The manual might also provide troubleshooting steps for addressing the issue associated with the error code. Follow these steps to determine if you can resolve the problem yourself.
Professional Help: If the issue persists or if you’re unsure about how to address the problem, consider seeking the assistance of a professional appliance repair technician. They can accurately diagnose the issue and perform any necessary repairs or replacements.
MAAR24™ Appliance Repair Process
Q: Is there anything I should do before calling a MAAR24 Appliance technician for help?
Q: How long will a dryer fix take?
Type of Issue: The nature of the problem greatly influences the repair time. Some issues, such as a clogged lint filter, may be resolved quickly, while others, like a faulty heating element or motor, could take longer to diagnose and repair.
Experience of the Technician: The expertise and experience of the technician performing the repair play a significant role in how quickly the issue is resolved. Experienced technicians may diagnose and fix problems more efficiently.
Availability of Parts: If the repair requires replacement parts, the time it takes to obtain those parts can impact the overall repair duration. Some parts may be readily available, while others might need to be ordered, potentially adding days to the process.
Complexity of the Dryer: High-end or complex dryer models may have more intricate systems, making repairs more time-consuming. Conversely, older or simpler models might be quicker to diagnose and fix.
Accessibility: The accessibility of the components that need repair can also affect the time it takes. If the technician needs to disassemble the dryer extensively to reach the problem area, it may take longer.
Preventative Maintenance: In some cases, a technician might recommend additional maintenance tasks, such as cleaning vents or ducts, to prevent future issues. These tasks can extend the repair time but help prevent recurring problems.
In general, minor issues that don’t require replacement parts can often be fixed
Q: When can I expect a dryer technician to arrive?
Scheduled Appointment: If you’ve scheduled a dryer repair appointment with a service provider, they will typically provide you with a specific time window for the technician’s arrival. This time window can range from a few hours to a half-day, depending on the company’s scheduling practices.
Emergency Service: If you have an urgent dryer issue, such as a malfunction that poses a safety hazard or a critical appliance breakdown, you may be able to request emergency service. In such cases, the technician may arrive as soon as possible, often within a few hours.
Same-Day Service: Some service providers offer same-day or next-day repair appointments for non-emergency issues. In these cases, you can expect the technician to arrive on the same day or the following day, depending on their availability and workload.
Appointment Confirmation: It’s common for service providers to confirm your appointment and estimated arrival time either through a phone call, text message, or email. Make sure to check for any updates or changes to the scheduled time.
Technician’s Schedule: The technician’s schedule for the day can also impact the arrival time. Delays at earlier appointments or complex repair jobs may affect the timing of subsequent appointments.
Service Window: Some service providers offer narrower service windows, such as one-hour arrival times, for an additional fee. This option provides a more precise estimate of when the technician will arrive.
Communication: If you have specific time constraints or scheduling preferences, it’s a good idea to communicate them with the service provider when scheduling the appointment. They may be able to accommodate your preferences when arranging the visit.
To ensure a smooth and efficient service appointment, it’s advisable to:
Be prepared and available during the scheduled time window.
Clear the area around the dryer to provide easy access to the appliance.
Have information about the dryer’s make, model, and any error codes or symptoms ready to share with the technician.
Be open
Q: Why is my dryer not turning on?
Power Supply:
Check the Power Cord: Ensure that the dryer’s power cord is securely plugged into a functioning electrical outlet. If the plug is loose or disconnected, the dryer won’t receive power.
Circuit Breaker or Fuse:
Check the Circuit Breaker: Examine the circuit breaker in your electrical panel (fuse box). If the breaker has tripped, reset it by switching it off and then back on. For homes with fuses, check if any fuses have blown, and replace them if necessary.
Door Switch:
Inspect the Door Switch: Dryers are equipped with a door switch that prevents them from operating when the door is open. Ensure that the door is securely closed and that the door switch is functioning correctly. If the switch is faulty, it may need to be replaced.
Thermal Fuse:
Check the Thermal Fuse: A thermal fuse is a safety device that can blow if the dryer overheats. If the thermal fuse is blown, the dryer won’t start. It’s usually located near the heating element or blower housing. If it’s blown, replace it, but also investigate and fix the underlying cause of overheating.
Start Switch:
Test the Start Switch: The dryer’s start switch, often located on the control panel, can malfunction over time. You can test it for continuity with a multimeter to determine if it’s working correctly. If it’s faulty, you may need to replace the switch.
Timer or Control Board:
Inspect the Timer/Control Board: If the timer or control board is defective, the dryer may not start. Check for any visible signs of damage or malfunction on these components. If necessary, consult the user manual or a technician to diagnose and replace the faulty part.
Overload Protection:
Reduce the Load: If the dryer’s motor is overloaded, it may not start. Try removing some items from the drum to reduce the load. Overloading the dryer can strain the motor and cause it to overheat, triggering a safety mechanism that prevents it from starting.
Broken Belt (For Drum-Driven Dryers):
Check the Drum Belt: If you have a dryer that’s belt-driven, a broken or slipped belt can prevent the drum from turning. Inspect the belt for damage or misalignment and replace it if necessary.
Safety Interlock:
Safety Interlock System: Some dryers have a safety interlock system that ensures various components, such as the motor and heating element, work together. If this system is malfunctioning, it can prevent the dryer from starting. Consult the user manual or a technician to diagnose and address this issue.
Professional Help:
If you’ve checked the above components and the dryer still doesn’t start, it’s advisable to seek the assistance of a qualified appliance repair technician. They can perform a comprehensive diagnosis and identify and address any underlying problems.
Remember to unplug the dryer and ensure it’s disconnected from the power source before performing any inspection or repair work for your safety.
Q: Why is my dryer getting really hot?
Restricted Airflow:
Lint Buildup: One of the most common causes of overheating dryers is a buildup of lint in the lint trap, exhaust duct, or within the dryer itself. Lint accumulation restricts airflow, causing the dryer to overheat.
Check and Clean: Regularly clean the lint filter after each use. Additionally, inspect and clean the exhaust duct and vent outside your home to ensure unrestricted airflow. A clogged vent can be a fire hazard and lead to overheating.
Thermostat Issues:
Faulty Thermostat: Dryers have multiple thermostats that regulate the temperature. If one of these thermostats malfunctions, it may not shut off the heating element when it should, leading to overheating.
Replace Thermostats: If you suspect a faulty thermostat, it’s advisable to have a technician test and replace the defective thermostat.
Heating Element Problems:
Stuck Heating Element: Sometimes, the heating element can get stuck in the “on” position, causing the dryer to constantly heat, leading to overheating.
Replace the Heating Element: If the heating element is found to be faulty or stuck, it should be replaced.
Venting Issues:
Improper Installation: An incorrectly installed vent or exhaust duct can lead to restricted airflow and overheating.
Professional Inspection: Have a professional inspect the dryer’s venting system to ensure it’s installed correctly and is not obstructed.
Faulty Motor or Motor Relay:
Motor Issues: If the dryer’s motor or its relay is malfunctioning, it can cause the dryer to overheat.
Professional Repair: A qualified technician should diagnose and address motor-related problems.
Overloading the Dryer:
Excessive Load: Overloading the dryer can strain its components, including the heating element and motor, leading to overheating. Avoid overloading to prevent these issues.
Ventilation:
Room Temperature: Ensure that the room or area where the dryer is located has proper ventilation and is not excessively hot. A lack of ventilation can cause the dryer to overheat.
Timer or Control Board Issues:
Faulty Controls: If the dryer’s timer or control board is malfunctioning, it may not regulate the drying cycle correctly, leading to overheating.
Repair or Replace: Consult the user manual or a technician to diagnose and address control-related issues.
If your dryer is consistently overheating, it’s essential to address the problem promptly to prevent potential safety hazards and damage to the appliance. If you’re unsure about the cause of the overheating or how to fix it, it’s advisable to contact a qualified appliance repair technician to diagnose and resolve the issue safely and effectively.
Q:How much does it cost to fix a dryer?
DIY Repairs: If you have the necessary skills and knowledge, you may be able to diagnose and fix some dryer issues yourself. In this case, your costs would be limited to the price of replacement parts, which can range from a few dollars for small components (like a thermal fuse or thermostat) to over $100 for more complex parts (such as a heating element or control board).
Professional Technician: Hiring a professional appliance repair technician is often the safest and most convenient option, especially for complex or potentially dangerous issues. The cost of hiring a technician will depend on their hourly rate, which can vary by location and experience level. Additionally, you may be charged a service fee for the technician’s visit, in addition to the cost of any replacement parts.
Warranty Coverage: If your dryer is still under warranty, the cost of repairs may be covered by the manufacturer. Be sure to check your warranty documentation for details on what is covered and how to initiate a warranty claim.
Age and Condition of the Dryer: Consider the age and overall condition of your dryer. If it’s an older unit and requires significant repairs, you might want to weigh the repair costs against the cost of purchasing a new dryer.
Common Repair Costs: Some common dryer repair costs include fixing issues like a broken heating element ($100-$300), replacing a faulty thermostat ($20-$100), or repairing a damaged drum belt ($10-$30).
Additional Costs: Keep in mind that there may be additional costs for labor, taxes, and any other necessary adjustments or maintenance.
It’s important to obtain a quote or estimate from a qualified technician before proceeding with any repairs to get a more accurate idea of the cost in your specific situation. They can diagnose the issue, provide a detailed estimate, and advise you on whether it’s more cost-effective to repair the dryer or replace it. Ultimately, the cost to fix a dryer can range from a relatively small expense for minor issues to several hundred dollars or more for major repairs or replacements.
Q:Is it better to buy a new dryer or fix the old one?
Age of the Dryer: The age of your current dryer is a crucial factor. If your dryer is relatively new and still under warranty, it’s usually more cost-effective to have it repaired, especially if the repair is covered by the warranty. However, if your dryer is older and nearing the end of its expected lifespan, it might make more sense to invest in a new one.
Cost of Repairs: Consider the cost of repairing your old dryer versus the cost of a new one. If the repair costs are relatively low and the dryer has a lot of life left in it, repairing it can be a good choice. However, if the repair costs are approaching or exceeding the cost of a new dryer, it may be more financially prudent to buy a replacement.
Energy Efficiency: Newer dryers are often more energy-efficient than older models. If you have an older, less efficient dryer, upgrading to a newer, more energy-efficient one can lead to long-term energy savings on your utility bills. This can be an important consideration if you plan to keep the dryer for many years.
Repetitive Issues: If your old dryer has a history of frequent breakdowns and repairs, it may be a sign that it’s becoming unreliable. In such cases, investing in a new, more reliable appliance may be a better choice to avoid ongoing repair costs and inconvenience.
Environmental Considerations: Repairing and extending the life of your old dryer can be a more environmentally friendly option compared to disposing of it and buying a new one. Reducing electronic waste is a positive environmental choice.
Personal Preference: Your personal preferences and priorities also play a role. Some people prefer the familiarity and reliability of their existing appliances, while others may see a new purchase as an opportunity to upgrade to more modern features or styles.
Budget: Your budget is a significant factor. If you’re on a tight budget and cannot afford a new dryer, repairing the old one might be the only viable option.
To make an informed decision, it’s a good idea to get a professional technician’s opinion on the state of your current dryer, the cost of repairs, and the expected remaining lifespan. They can help you assess whether repair is a practical option.
Ultimately, the decision to repair or replace your dryer should be based on a combination of factors, including cost, age, energy efficiency, and your personal preferences and circumstances. Carefully weighing these factors will help you make the choice that’s right for you.
Q: Why is my dryer making scraping noises?
Foreign Objects: Check inside the drum for any foreign objects that may have become lodged between the drum and the dryer’s interior, such as coins, buttons, or zippers. These objects can cause scraping noises as the drum rotates.
Worn Drum Rollers or Bearings: The drum of the dryer sits on support rollers or bearings, and if they become worn or damaged, they can produce scraping or squeaking sounds as the drum turns. These parts may need lubrication or replacement.
Worn or Misaligned Belt: The drive belt that rotates the drum can wear out or become misaligned, causing it to scrape against other components. Inspect the belt for damage or misalignment and replace it if necessary.
Idler Pulley Issues: The idler pulley maintains tension on the drive belt. If it’s worn out or damaged, it can create noise when the drum rotates. The idler pulley may need to be replaced.
Dryer Drum Glides: Some dryers have drum glides or slides that support the drum’s movement. If these components wear out, they can lead to scraping noises. Replacing the glides can solve the issue.
Rear Drum Bearing: Some dryers have a rear drum bearing that supports the rear of the drum. If this bearing is worn or damaged, it can create noise as the drum rotates.
Motor Problems: In some cases, a malfunctioning motor can produce unusual noises. If the motor is making scraping sounds, it may need to be serviced or replaced.
Blower Wheel Issues: The blower wheel, which circulates air through the dryer, can accumulate lint and debris. If it becomes clogged or damaged, it can create noise. Cleaning or replacing the blower wheel may be necessary.
Loose or Worn Components: Loose or worn components, such as screws, brackets, or fasteners, can create noise when they vibrate against other parts. Tightening or replacing these components may resolve the issue.
To determine the exact cause of the scraping noise, it’s often best to have a professional appliance technician inspect and diagnose the dryer. They can disassemble the dryer if needed, identify the problem, and recommend the necessary repairs. Attempting to fix the issue without proper knowledge or tools can potentially lead to further damage or safety hazards, so it’s usually advisable to seek professional assistance for dryer repairs.
Q: What do I do if my dryer is getting too hot?
Turn Off and Unplug the Dryer: Safety first. Turn off the dryer and unplug it from the electrical outlet to prevent any electrical accidents.
Check for Obstructions: Ensure that the dryer’s lint filter is clean and free of lint buildup. Lint accumulation can restrict airflow, causing the dryer to overheat. Remove and clean the lint filter if necessary.
Inspect the Ventilation System: Check the dryer’s exhaust vent and duct for any obstructions, such as lint buildup or debris. Make sure the vent is clear and unobstructed. If the venting system is clogged, it can lead to overheating.
Verify Proper Installation: Ensure that the dryer is installed correctly with the appropriate venting materials and proper venting length. An improper installation can lead to overheating issues.
Check the Thermostat: Most dryers have multiple thermostats that regulate the dryer’s temperature. A malfunctioning thermostat can cause the dryer to run too hot. You may need to have a technician check and replace the faulty thermostat.
Inspect the Heating Element: If the dryer is still getting too hot, the heating element may be faulty or damaged. A damaged heating element can cause the dryer to run excessively hot. It may need to be replaced.
Clean the Interior: Dust and lint can accumulate inside the dryer’s cabinet over time. Cleaning the interior of the dryer can help improve airflow and prevent overheating. Be sure to turn off the power and unplug the dryer before cleaning the interior.
Check the Blower Wheel: The blower wheel circulates air through the dryer. If it becomes clogged with lint or debris, it can hinder airflow and cause overheating. Clean or replace the blower wheel if necessary.
Examine the Ductwork: Inspect the ductwork connecting the dryer to the vent for any damage or kinks. Damaged ducts can restrict airflow, leading to overheating. Repair or replace damaged ducts as needed.
Consult a Professional Technician: If you’ve checked the above components and the problem persists, it’s advisable to consult a professional appliance technician. They can diagnose the issue more accurately, perform any necessary repairs, and ensure that the dryer is safe to use.
Remember that an overheating dryer can be a fire hazard, so it’s essential to address the issue promptly and not use the dryer until the problem has been resolved. Regular maintenance, including cleaning the lint filter and checking the exhaust system, can help prevent overheating issues in the future.
Q: What do I do if my dryer is not getting hot enough?
Check the Dryer Settings: Start by ensuring that you have selected the appropriate heat setting for your laundry load. Make sure you haven’t accidentally set the dryer to a “low heat” or “air dry” mode, which would result in lower temperatures.
Clean the Lint Filter: A clogged lint filter can restrict airflow and lead to reduced heating efficiency. Before each load, clean the lint filter to ensure proper airflow. If it’s exceptionally dirty, consider washing it with warm, soapy water and allowing it to dry thoroughly before reinstalling it.
Inspect the Ventilation System: Check the dryer’s exhaust vent and duct for any obstructions, such as lint buildup or debris. A blocked vent can limit the airflow and cause reduced heating. Ensure that the vent is clear and unobstructed.
Check the Thermostat: Dryers typically have multiple thermostats that regulate the temperature. If one of these thermostats is faulty, it can cause the dryer to run cooler than it should. A professional technician can test and replace any malfunctioning thermostats.
Examine the Heating Element: The heating element in an electric dryer is responsible for generating heat. If it’s damaged or worn out, the dryer may not get hot enough. You may need to have the heating element inspected and replaced if necessary.
Inspect the Ignitor (Gas Dryers): Gas dryers have an ignitor that starts the burner. If the ignitor is faulty, it can prevent the dryer from heating properly. A technician can test and replace the ignitor if needed.
Verify the Circuit Breaker: For electric dryers, check the circuit breaker or fuse box to make sure the dryer’s circuit is not tripped or a fuse is not blown. Reset or replace the breaker or fuse if necessary.
Clean the Dryer Interior: Dust and lint can accumulate inside the dryer’s cabinet, which can affect its heating efficiency. Turn off the power and unplug the dryer, then clean the interior to improve airflow.
Consult a Professional Technician: If you’ve checked all of the above and the problem persists, it’s advisable to consult a professional appliance technician. They have the expertise and tools to diagnose and repair more complex heating issues.
Remember that working with gas appliances can be dangerous, so exercise caution and consider hiring a professional if you have a gas dryer and suspect a gas-related issue. In general, addressing heating problems in a timely manner can help prolong your dryer’s life and ensure it operates efficiently.
Q: Why does my dryer’s cycle last so long?
Clogged Lint Filter: A clogged or dirty lint filter can restrict airflow, making it harder for the dryer to dry your clothes efficiently. Clean the lint filter before every load to ensure proper airflow.
Blocked Vent or Duct: A blocked or partially obstructed exhaust vent or duct can hinder the release of hot, moist air from the dryer. Check the vent and duct for obstructions, and make sure they are clear and unobstructed. Remove lint buildup if present.
Too Large a Load: Overloading the dryer with too many clothes can slow down the drying process. Follow the manufacturer’s guidelines for load size and avoid overcrowding the dryer.
Uneven Load Distribution: If the load inside the dryer is not evenly distributed, it can lead to longer drying times. Try to distribute the clothes evenly inside the drum to promote efficient drying.
Faulty Heating Element: If the heating element in an electric dryer is malfunctioning or damaged, it can result in inadequate heating, leading to longer drying times. A professional technician can test and replace the heating element if necessary.
Cool or Cold Ambient Temperature: Drying times can be longer in cooler or colder environments. Make sure the room where the dryer is located is adequately heated, as this can affect the efficiency of the dryer.
Faulty Thermostat: A malfunctioning thermostat may not accurately sense the temperature inside the dryer, causing it to run for longer periods. A technician can diagnose and replace a faulty thermostat.
Old or Worn-Out Dryer: As dryers age, their performance can decline. If your dryer is old and has been operating for many years, it may not be as efficient as it once was. Consider whether it’s time for a replacement if other troubleshooting steps don’t resolve the issue.
Exhaust Vent Length: Longer exhaust venting systems can result in increased drying times, as the air must travel a greater distance. If possible, use the shortest and most direct venting path.
Excessive Wrinkling: Some dryer cycles include cool-down periods to prevent wrinkles. While this may extend the cycle time, it can help reduce wrinkling. Check your dryer settings and options to see if this feature can be adjusted.
If you’ve checked these common issues and your dryer still takes longer than expected to complete a cycle, it’s advisable to consult a professional technician for a thorough inspection. They can diagnose and repair any underlying problems that may be affecting your dryer’s efficiency and performance.
Q: Why doesn’t my dryer spin well?
Broken or Worn Drive Belt: The drive belt is responsible for turning the drum. Over time, it can become worn, frayed, or even break. Inspect the drive belt for damage and replace it if necessary.
Drive Motor Issues: The dryer’s drive motor is responsible for turning the drum. If the motor is malfunctioning or has failed, it can prevent the drum from spinning. A technician can test and replace the motor if needed.
Idler Pulley Problems: The idler pulley keeps tension on the drive belt. If the idler pulley is worn out or damaged, it can cause the drive belt to slip or become loose, resulting in poor drum rotation. Replace the idler pulley if necessary.
Worn or Damaged Drum Rollers or Bearings: Dryers often have drum support rollers or bearings that help the drum rotate smoothly. If these components are worn out or damaged, they can impede the drum’s movement. Inspect and replace worn rollers or bearings.
Jammed Objects: Occasionally, small items like coins, buttons, or even clothing can become lodged between the drum and the dryer’s interior, preventing it from spinning. Carefully check for and remove any obstructions.
Drive Motor Capacitor (Electric Dryers): Electric dryers may have a drive motor capacitor that helps start the motor. If the capacitor is faulty, the motor may not start or may not spin the drum properly. A technician can test and replace the capacitor if needed.
Faulty Start Switch: The dryer’s start switch initiates the motor’s operation. If it’s faulty, the motor may not start, or it may not start consistently. A technician can test and replace the start switch if necessary.
Thermal Fuse: Some dryers have a thermal fuse that can blow if the dryer overheats. If the thermal fuse is blown, it can interrupt power to the motor, preventing the drum from spinning. Check and replace the thermal fuse if needed.
Door Switch Problems: Dryers often have a door switch that must be engaged for the dryer to operate. If the door switch is faulty or not engaging properly, it can prevent the dryer from starting or the drum from spinning.
Timer or Control Board Issues: In some cases, problems with the dryer’s timer or control board can affect its operation. A technician can diagnose and repair issues related to the control system.
Drive System Misalignment: In rare cases, the drive system components may become misaligned, preventing the drum from spinning smoothly. A technician can realign these components if necessary.
If your dryer drum is not spinning properly, it’s advisable to unplug the dryer and avoid using it until the issue is resolved, as continued use may cause further damage. Diagnosing and repairing dryer drum spin problems may require the skills and expertise of a professional appliance technician, especially for more complex issues. Consult a technician to assess and address the problem to ensure safe and efficient dryer operation.
Q: Should I continue using my dryer if I notice a problem?
Safety Hazards: Depending on the nature of the problem, using a malfunctioning dryer can pose safety hazards, including the risk of electrical fires, gas leaks (for gas dryers), or mechanical failures that could lead to injuries.
Worsening of the Problem: Continuing to use a dryer with a problem can exacerbate the issue, making it more costly to repair in the long run. What might have been a relatively simple and inexpensive repair could become a major and costly one if the problem is not addressed promptly.
Energy Efficiency: A malfunctioning dryer is likely to be less energy-efficient, which can lead to increased utility costs over time. It may take longer to dry clothes, leading to higher energy consumption.
Damage to Clothing: A malfunctioning dryer may not provide the proper level of heat or airflow, which can result in uneven drying and damage to your clothing, such as shrinkage, fabric damage, or excessive wrinkling.
Warranty Considerations: If your dryer is still under warranty, using it with a problem may void the warranty. Manufacturers typically require that appliances are used according to their guidelines and with any issues addressed promptly.
If you notice a problem with your dryer, it’s best to take the following steps:
Stop Using It: Turn off and unplug the dryer immediately to prevent further use until the problem is resolved.
Diagnose the Issue: If you’re comfortable and knowledgeable about appliance repair, you can attempt to diagnose the issue. Check the user manual for troubleshooting tips. However, for safety and reliability, it’s often advisable to consult a professional technician, especially for complex or potentially hazardous problems.
Consult a Technician: Contact an experienced appliance repair technician to assess the problem, provide a diagnosis, and recommend the necessary repairs. They have the expertise and tools to safely and accurately identify and address issues with your dryer.
Consider Repair or Replacement: Once you have a diagnosis and repair estimate, consider whether it’s more cost-effective to repair the dryer or replace it. The age and overall condition of the dryer, along with the cost of repairs, should be taken into account when making this decision.
In summary, it’s best to err on the side of caution and safety by discontinuing the use of your dryer when you notice a problem and seeking professional assistance to address the issue promptly. This approach helps ensure the safe and efficient operation of your appliance.
Q: How can I maintain my dryer?
Clean the Lint Filter: Before every load, remove and clean the lint filter. A clogged lint filter restricts airflow, making your dryer less efficient and potentially causing it to overheat. Wash the filter with warm, soapy water periodically to remove residue from fabric softeners.
Clean the Interior: Periodically, unplug the dryer and clean the interior of lint and dust. Pay attention to the area around the lint filter, the drum, and the exhaust duct. Be cautious and avoid damaging any electrical or mechanical components.
Check the Exhaust Vent: Ensure that the dryer’s exhaust vent and duct are clear and unobstructed. Lint and debris can accumulate in the vent, reducing airflow and causing the dryer to work less efficiently. Clean the vent regularly, and consider using a vent brush or vacuum attachment to remove lint buildup.
Inspect the Ductwork: Check the ductwork connecting the dryer to the vent for any damage or kinks. Damaged ducts can restrict airflow, leading to longer drying times. Repair or replace damaged ducts as needed.
Monitor Dryer Location: Make sure your dryer is properly installed and has adequate space for airflow. Ensure that the dryer is level to prevent unnecessary wear on its components.
Don’t Overload the Dryer: Overloading the dryer can lead to inefficient drying and increased wear on the drum and drive system. Follow the manufacturer’s guidelines for load size.
Use Dryer Balls or Tennis Balls: Dryer balls or tennis balls can help improve drying efficiency by agitating the clothes and reducing drying time. They can also help prevent clothes from clumping together.
Inspect the Drum Belt: Periodically, check the condition of the drum belt. If it’s frayed or shows signs of wear, it may need to be replaced.
Regularly Clean the Exhaust Hood: The exterior exhaust hood can accumulate lint and debris. Clean it to ensure proper ventilation.
Check for Unusual Noises or Vibrations: Pay attention to any unusual noises or vibrations during operation. If you notice anything out of the ordinary, it could be a sign of a problem that requires attention.
Maintain Gas Dryers: If you have a gas dryer, ensure that the gas supply line is secure, and periodically inspect it for leaks. Gas dryers may require additional maintenance for the gas components.
Schedule Professional Maintenance: Consider scheduling regular professional maintenance for your dryer, especially if it’s an older model or you use it frequently. A technician can perform a thorough inspection, clean internal components, and address any potential issues before they become major problems.
Read the User Manual: Familiarize yourself with your dryer’s user manual, which contains important maintenance guidelines and recommendations specific to your dryer model.
By following these maintenance tips, you can help keep your dryer in good working condition, reduce energy consumption, and extend its lifespan. Regular maintenance can also help you catch and address issues early, saving you money on repairs in the long run.
Q: How do I make my dryer more energy efficient?
Clean the Lint Filter Before Every Load: A clean lint filter allows for better airflow, which means your dryer doesn’t have to work as hard or run as long to dry your clothes. Cleaning it before each load is one of the most effective ways to improve efficiency.
Dry Full Loads: Dry multiple loads of laundry back-to-back to take full advantage of the residual heat left in the dryer from the previous cycle. However, avoid overloading the dryer, as this can reduce airflow and hinder efficiency.
Use the Moisture Sensor Setting: Many modern dryers come equipped with moisture sensors that detect when your clothes are dry and automatically shut off the dryer. Using this setting can prevent over-drying and save energy.
Choose Low Heat Settings: Whenever possible, use low or medium heat settings instead of high heat. Lower heat settings use less energy and are gentler on your clothes.
Dry Similar Fabrics Together: Group similar fabrics together when drying. Lightweight fabrics dry faster than heavy ones, so drying them together can improve efficiency.
Use Dryer Balls or Tennis Balls: Adding dryer balls or clean tennis balls to the dryer can help fluff and separate clothes, reducing drying time and energy consumption.
Regularly Clean the Exhaust Vent: Ensure that the dryer’s exhaust vent and duct are clean and unobstructed. A blocked vent can restrict airflow, causing the dryer to work harder. Clean the vent periodically to maintain optimal efficiency.
Inspect the Ductwork: Check the ductwork connecting the dryer to the vent for any damage or kinks. Damaged ducts can reduce airflow and increase drying time. Repair or replace damaged ducts as needed.
Adjust Dryer Location: Place your dryer in a well-ventilated area with good air circulation. Adequate ventilation helps dissipate heat, making the dryer work more efficiently.
Regularly Maintain the Dryer: Follow the manufacturer’s recommendations for regular maintenance, including checking and cleaning the blower wheel, motor, and heating element if necessary.
Upgrade to an Energy-Efficient Dryer: If your current dryer is old and inefficient, consider upgrading to a more energy-efficient model. Look for dryers with an ENERGY STAR certification, which indicates they meet energy efficiency standards.
Consider a Heat Pump Dryer: Heat pump dryers are more energy-efficient than traditional electric dryers. They recirculate and reuse hot air, reducing the amount of energy needed to dry your clothes.
Use a Drying Rack: For items that don’t need to be completely dry, consider using a drying rack or a clothesline. This can save energy and reduce wear and tear on your dryer.
Time Your Drying: If your dryer doesn’t have a moisture sensor, consider using a kitchen timer to remind you to check your clothes periodically and prevent over-drying.
By implementing these energy-saving practices and being mindful of how you use your dryer, you can significantly increase its energy efficiency, reduce energy consumption, and lower your energy bills.
Q: Where should I position my dryer for maximum efficiency and safety?
Ventilation: Place your dryer in a well-ventilated area. Proper ventilation helps dissipate heat and moisture generated during the drying process. Ensure there is adequate airflow around the dryer to prevent overheating.
Venting to the Outside: Always vent your dryer to the outside of your home. The exhaust duct should lead to the outdoors, not into an attic, crawlspace, or another enclosed area. Use a rigid or semi-rigid metal duct for venting, as it provides better airflow and reduces the risk of lint buildup.
Short and Direct Venting Path: Keep the venting path as short and direct as possible. Longer ducts with multiple bends can reduce dryer efficiency and increase drying time. Minimize the number of bends and use the shortest route to the outside.
Avoid Crushed or Kinked Ducts: Ensure that the dryer’s exhaust duct is not crushed or kinked, as this can restrict airflow. Use duct clamps or straps to secure the duct in place and prevent it from sagging.
Leveling: Ensure that your dryer is level. An unlevel dryer can vibrate excessively, leading to premature wear and reduced efficiency.
Sturdy Flooring: Place the dryer on a sturdy, level floor. If your floor is not level, consider using a leveling kit to stabilize the dryer. Avoid installing the dryer on a carpeted surface, as it can obstruct airflow and create a fire hazard.
Clearances: Maintain proper clearances around the dryer. Leave enough space for adequate airflow, and avoid obstructing the back and sides of the dryer. Refer to your dryer’s user manual for manufacturer-recommended clearances.
Location: Install the dryer in an area that is easily accessible and well-lit. This makes it more convenient to load and unload clothes and perform routine maintenance.
Fire Safety: Install a smoke detector near the laundry area for added safety. Regularly clean the lint filter and the exhaust duct to reduce the risk of lint buildup, which can be a fire hazard.
Check Local Codes: Check your local building codes and regulations for any specific requirements related to dryer installation and ventilation. Local codes may vary, and compliance is essential for safety.
Keep Flammable Materials Away: Do not store or place flammable materials, such as cleaning products or paper products, near the dryer.
Professional Installation: If you are unsure about proper installation or venting, consider hiring a professional technician or installer who can ensure that your dryer is set up correctly and safely.
By following these guidelines and ensuring proper ventilation and clearances, you can position your dryer for maximum efficiency and safety, reducing the risk of hazards and helping your dryer operate effectively.
Q: Why is my dryer taking longer than usual to dry clothes?
Clogged Lint Filter: A clogged or dirty lint filter restricts airflow, making it harder for the dryer to dry your clothes efficiently. Clean the lint filter before every load to ensure proper airflow.
Blocked Vent or Duct: A blocked or partially obstructed exhaust vent or duct can hinder the release of hot, moist air from the dryer. Check the vent and duct for obstructions and ensure they are clear and unobstructed.
Overloading the Dryer: Overloading the dryer with too many clothes can slow down the drying process. Follow the manufacturer’s guidelines for load size and avoid overloading the dryer.
Low Heat Settings: Ensure that you are using an appropriate heat setting for the type of load you are drying. Using low heat settings for heavy or bulky items can prolong drying times.
Moisture Sensor Issues: Some dryers have moisture sensors that detect when your clothes are dry and automatically shut off the dryer. If the sensor is malfunctioning, it may not accurately detect the moisture level, leading to longer drying times.
Faulty Heating Element (Electric Dryers): If the heating element is malfunctioning or damaged, it can result in inadequate heating, causing the dryer to run longer. A professional technician can test and replace the heating element if necessary.
Cool or Cold Ambient Temperature: Drying times can be longer in cooler or colder environments. Make sure the room where the dryer is located is adequately heated, as this can affect the efficiency of the dryer.
Faulty Thermostat: A malfunctioning thermostat may not accurately sense the temperature inside the dryer, causing it to run longer than necessary. A technician can diagnose and replace a faulty thermostat.
Vent Length and Ductwork: Longer exhaust venting systems and complex ductwork can result in increased drying times, as the air must travel a greater distance. Use the shortest and most direct venting path possible.
Excessive Wrinkling: Some dryer cycles include cool-down periods to prevent wrinkles. While this may extend the cycle time, it can help reduce wrinkling. Check your dryer settings and options to see if this feature can be adjusted.
If you’ve checked these common issues and your dryer still takes longer than expected to dry clothes, it’s advisable to consult a professional appliance technician. They can diagnose the problem more accurately, perform any necessary repairs, and ensure that the dryer is safe and efficient to use.
Q: How can I maintain my dryer?
Clean the Lint Filter: Before every load, remove and clean the lint filter. A clean lint filter allows for proper airflow and helps your dryer work more efficiently. Wash the filter with warm, soapy water periodically to remove fabric softener residue.
Clean the Interior: Periodically, unplug the dryer and clean the interior of lint and dust. Pay attention to the area around the lint filter, the drum, and the exhaust duct. Be cautious and avoid damaging any electrical or mechanical components.
Check the Exhaust Vent: Ensure that the dryer’s exhaust vent and duct are clear and unobstructed. A blocked vent can restrict airflow, making the dryer work harder and less efficiently. Clean the vent regularly to maintain optimal efficiency.
Inspect the Ductwork: Check the ductwork connecting the dryer to the vent for any damage or kinks. Damaged ducts can reduce airflow and increase drying time. Repair or replace damaged ducts as needed.
Clean the Exhaust Hood: The exterior exhaust hood can accumulate lint and debris. Clean it to ensure proper ventilation and prevent blockages.
Don’t Overload the Dryer: Overloading the dryer can lead to inefficient drying and increased wear on the drum and drive system. Follow the manufacturer’s guidelines for load size.
Regularly Clean the Blower Wheel: The blower wheel circulates air through the dryer. Dust and lint can accumulate on the blower wheel, reducing efficiency. Periodically, turn off the power and unplug the dryer, then clean the blower wheel.
Leveling: Ensure that your dryer is level. An unlevel dryer can vibrate excessively, leading to premature wear and reduced efficiency.
Inspect the Drum Belt: Periodically, check the condition of the drum belt. If it’s frayed or shows signs of wear, it may need to be replaced.
Check the Gas Connection (Gas Dryers): If you have a gas dryer, periodically inspect the gas connection to ensure there are no leaks. If you suspect a gas leak, turn off the gas supply and contact a professional technician.
Use Dryer Balls or Tennis Balls: Adding dryer balls or clean tennis balls to the dryer can help fluff and separate clothes, reducing drying time and energy consumption.
Regularly Maintain the Moisture Sensor (if applicable): If your dryer has a moisture sensor, clean it with a soft cloth and rubbing alcohol periodically to ensure accurate drying.
Inspect the Door Seal: Check the door seal for signs of wear or damage. A damaged seal can allow hot air to escape, reducing efficiency. Replace the seal if necessary.
Professional Maintenance: Consider scheduling professional maintenance for your dryer, especially if it’s an older model or you use it frequently. A technician can perform a thorough inspection, clean internal components, and address any potential issues before they become major problems.
Read the User Manual: Familiarize yourself with your dryer’s user manual, which contains important maintenance guidelines and recommendations specific to your dryer model.
By following these maintenance tips and performing regular checks, you can help keep your dryer in good working condition, reduce energy consumption, and extend its lifespan. Regular maintenance can also help you catch and address issues early, saving you money on repairs in the long run.
Q: Can I get my dryer fixed on the same day?
Service Availability: If you contact an appliance repair service with same-day service availability and there is a technician available in your area, it may be possible to schedule a same-day repair appointment.
Emergency Repairs: Some repair services offer emergency or same-day repair appointments for urgent issues, such as a malfunctioning dryer posing safety concerns. These services prioritize addressing critical problems quickly.
Technician Availability: The availability of repair technicians can vary depending on the time of day and the service’s workload. If a technician is available and can be dispatched to your location promptly, you may be able to get your dryer fixed on the same day.
Complexity of the Issue: The time required for a same-day repair may also depend on the complexity of the problem. Some issues may be straightforward and can be resolved quickly, while others may require more time for diagnosis and repair.
Scheduling Policies: The policies and procedures of the appliance repair service play a role in whether same-day service is possible. Some companies specialize in providing quick response times, while others may have a standard scheduling process with set appointment windows.
To increase the likelihood of getting your dryer fixed on the same day:
Contact repair services that offer same-day or emergency repair options.
Provide detailed information about the issue when scheduling the appointment to help technicians come prepared with the necessary tools and parts.
Be flexible with your schedule to accommodate technician availability.
Keep in mind that same-day service may not always be possible, especially during peak service times or if the repair service is in high demand. Additionally, the availability of parts required for the repair can impact the timeline. It’s a good idea to inquire about the service’s policies and availability when scheduling your dryer repair to better understand your options.
Q: How do I clean dye transfer from the dryer drum?
Rubber gloves
A cloth or sponge
Mild dish soap or laundry detergent
Baking soda
A plastic or nylon scrubbing pad or an old credit card
White vinegar
Water
A soft cloth or towel
Steps:
Safety First: Put on rubber gloves to protect your hands during the cleaning process.
Unplug the Dryer: Safety is essential, so make sure your dryer is unplugged from the electrical outlet to avoid any accidents.
Remove Loose Debris: Use a dry cloth or sponge to remove any loose lint or debris from the dryer drum. This will help you get a better view of the dye stains.
Create a Cleaning Solution: In a bucket or small bowl, mix a solution of mild dish soap or laundry detergent and warm water. Stir it until you have a soapy solution.
Dampen a Cloth or Sponge: Dip a cloth or sponge into the soapy water mixture. Wring it out to ensure it’s damp but not soaking wet.
Gently Scrub the Stains: Begin by gently scrubbing the dye transfer stains with the damp cloth or sponge. Apply a bit of pressure, but avoid using excessive force to prevent damaging the dryer’s enamel or finish.
Use Baking Soda: For stubborn stains that won’t come off with the soapy water, sprinkle a small amount of baking soda onto the stains. Baking soda is mildly abrasive and can help lift the stains without scratching the drum.
Scrub with a Plastic or Nylon Pad: If the stains persist, use a plastic or nylon scrubbing pad (like the type used for non-stick cookware) to gently scrub the stains. Alternatively, you can also try using an old credit card, as the edge can help scrape off the stains without damaging the drum.
Rinse with Vinegar: Mix equal parts white vinegar and water in a spray bottle. Spray this vinegar solution onto the stained areas. The vinegar can help break down and dissolve the dye stains.
Scrub Again and Rinse: Scrub the stained areas with the cloth, sponge, or scrubbing pad while the vinegar solution is still wet. Rinse the drum thoroughly with a clean, damp cloth to remove any remaining cleaning residues and vinegar.
Dry the Drum: Allow the dryer drum to air dry completely. This will help ensure there are no leftover cleaning residues that could transfer to your clothes during the next cycle.
Inspect and Repeat if Necessary: After the drum has dried, inspect it for any remaining dye transfer stains. If any stains persist, repeat the cleaning process until the drum is stain-free.
Once you’ve successfully removed the dye transfer stains from the dryer drum, you can use a damp cloth to wipe down the entire interior of the drum to remove any lingering cleaning residues. Always ensure that the dryer drum is completely dry before using it again to avoid transferring any residual cleaning agents to your clothes during the next cycle.
Q: How often should I clean lint?
Lint Filter: Daily or Before Every Load
Clean the lint filter before every load of laundry. This is a quick and simple task that helps maintain proper airflow, ensuring your dryer operates efficiently.
Lint Trap and Duct: Monthly
In addition to cleaning the lint filter, you should also clean the lint trap (the area surrounding the lint filter) and the duct leading from the lint trap to the exhaust vent. This can be done on a monthly basis to prevent lint buildup.
Exhaust Vent and Ductwork: Annually
Inspect and clean the entire exhaust vent and ductwork leading to the outside of your home at least once a year. This involves disconnecting the dryer from the vent and removing any accumulated lint or debris. A clogged vent can lead to reduced airflow, longer drying times, and potentially create a fire hazard.
Inside the Dryer Drum: Periodically
Periodically, unplug the dryer and open the dryer door to inspect the interior of the drum. While the drum itself doesn’t accumulate lint like the filter and vent, it can collect lint from clothes. Remove any visible lint or debris from the drum with a cloth or sponge.
Blower Wheel and Motor: Professional Inspection
The blower wheel and motor are located inside the dryer and can accumulate lint and debris over time. These components are best inspected and cleaned by a professional appliance technician during routine maintenance.
Moisture Sensor (if applicable): As Needed
If your dryer has a moisture sensor, periodically check and clean it with a soft cloth and rubbing alcohol to ensure accurate drying.
Lint Screen Housing: As Needed
On some dryers, lint can accumulate in the lint screen housing, even after regular cleaning of the lint filter. Check the housing periodically and remove any lint buildup if necessary.
The frequency of cleaning may vary depending on factors such as how often you use your dryer, the types of fabrics you dry, and the length of ductwork. Regular maintenance not only improves the efficiency of your dryer but also reduces the risk of fire, as lint is highly flammable.
Remember to unplug the dryer or turn off its power source before performing any maintenance tasks, especially when cleaning areas inside the dryer or near electrical components. If you’re unsure about any aspect of dryer maintenance, consider consulting the dryer’s user manual or hiring a professional appliance technician to perform a thorough inspection and cleaning.
Q: What do I do if my dryer is getting too hot?
Stop Using the Dryer: First and foremost, stop using the dryer immediately. Turn off the dryer and unplug it from the electrical outlet to ensure safety.
Allow the Dryer to Cool Down: Leave the dryer to cool down for at least 30 minutes before attempting any further action. Overheating may be due to a temporary issue, and allowing it to cool can help identify the cause more accurately.
Check the Ventilation: Ensure that the dryer’s exhaust vent and duct are clear and unobstructed. A blocked or partially obstructed vent can lead to overheating. Remove any lint or debris from the vent and duct.
Inspect the Lint Filter and Lint Trap: Clean the lint filter and lint trap thoroughly. A clogged lint filter or trap can restrict airflow, causing the dryer to overheat. Ensure these components are clean and free of lint buildup.
Examine the Thermostat: The dryer’s thermostat is responsible for regulating the temperature. If it’s malfunctioning, it can cause overheating. A professional technician can test and replace the thermostat if needed.
Check the Heating Element (Electric Dryers): In electric dryers, a malfunctioning or damaged heating element can lead to excessive heat. A technician can test the heating element and replace it if necessary.
Verify the Venting Path: Ensure that the venting path from the dryer to the outside is not excessively long or obstructed. A long, convoluted venting path can lead to overheating. Use the shortest and most direct venting route possible.
Clean the Blower Wheel and Motor: Dust and lint can accumulate on the blower wheel and motor, reducing airflow and causing overheating. A technician can clean these components and ensure they are functioning correctly.
Inspect the Drum Seal: Check the drum seal for signs of wear or damage. A damaged seal can allow hot air to escape, leading to overheating. Replace the seal if necessary.
Adjust Dryer Settings: Ensure that you are using the appropriate heat setting for the type of load you are drying. Avoid using excessively high heat settings for delicate items.
Professional Inspection: If you’re unable to identify or resolve the issue on your own, it’s advisable to consult a professional appliance technician. They can perform a comprehensive diagnosis, identify the root cause of the overheating, and make any necessary repairs or replacements.
Overheating in a dryer should be taken seriously due to the potential safety risks involved. Regular maintenance and prompt attention to any overheating issues can help ensure the safe and efficient operation of your dryer.
Q: What do I do if my dryer is not getting hot enough?
Check the Dryer Settings: Ensure that you have selected the appropriate heat setting for your load. Some dryers have multiple heat settings, including low, medium, and high. Make sure you have chosen the correct setting for your fabrics.
Verify the Timer or Sensor Settings: If your dryer has a timer, check that it is set for a sufficient drying time. If your dryer uses moisture sensors to detect when clothes are dry, make sure the sensors are clean and functioning correctly. Sensor bars can accumulate residue over time, affecting their accuracy.
Clean the Lint Filter: A clogged lint filter can restrict airflow, leading to reduced heat output. Clean the lint filter before every load to ensure proper airflow.
Inspect the Lint Trap and Ductwork: Beyond the lint filter, check the lint trap area and the ductwork leading to the exhaust vent. Remove any lint or debris that may be obstructing airflow.
Check for Obstructions: Ensure that the dryer’s exhaust vent and duct to the outside are clear and not obstructed. A blocked vent can restrict airflow and cause heating problems.
Inspect the Heating Element (Electric Dryers): In electric dryers, the heating element is responsible for generating heat. If it’s faulty or damaged, the dryer may not produce sufficient heat. A technician can test the heating element and replace it if necessary.
Check the Thermostat: Dryers have thermostats that regulate the temperature. A malfunctioning thermostat can lead to insufficient heating. A professional technician can test and replace the thermostat if needed.
Monitor Load Size: Overloading the dryer can lead to longer drying times and reduced heat output. Make sure you are not overloading the dryer with too many clothes at once.
Examine the Venting Path: Ensure that the venting path from the dryer to the outside is not excessively long or obstructed. A long, convoluted venting path can lead to reduced heating efficiency.
Inspect the Door Seal: Check the door seal for any signs of wear or damage. A damaged seal can allow heat to escape, affecting the dryer’s ability to heat effectively. Replace the seal if necessary.
Professional Inspection: If you have tried the above steps and the problem persists, it’s advisable to contact a professional appliance technician. They can perform a comprehensive diagnosis to identify the root cause of the heating issue and make any necessary repairs or replacements.
It’s essential to address heating problems in your dryer promptly to avoid extended drying times, increased energy consumption, and potential damage to your clothes. Regular maintenance and timely repairs can help ensure that your dryer operates efficiently and effectively.
Q: Why does my dryer’s cycle last so long?
Clogged Lint Filter: A clogged or dirty lint filter can restrict airflow, leading to longer drying times. Clean the lint filter before every load to ensure proper airflow.
Blocked Vent or Duct: A blocked or partially obstructed exhaust vent or duct can hinder the release of hot, moist air from the dryer. Check the vent and duct for obstructions and ensure they are clear and unobstructed.
Overloading the Dryer: Overloading the dryer with too many clothes can slow down the drying process. Follow the manufacturer’s guidelines for load size and avoid overloading the dryer.
Low Heat Settings: Ensure that you are using an appropriate heat setting for the type of load you are drying. Using low heat settings for heavy or bulky items can prolong drying times.
Moisture Sensor Issues: Some dryers have moisture sensors that detect when your clothes are dry and automatically shut off the dryer. If the sensor is malfunctioning, it may not accurately detect the moisture level, leading to longer drying times.
Faulty Heating Element (Electric Dryers): If the heating element is malfunctioning or damaged, it can result in inadequate heating, causing the dryer to run longer. A professional technician can test and replace the heating element if necessary.
Cool or Cold Ambient Temperature: Drying times can be longer in cooler or colder environments. Make sure the room where the dryer is located is adequately heated, as this can affect the efficiency of the dryer.
Vent Length and Ductwork: Longer exhaust venting systems and complex ductwork can result in increased drying times, as the air must travel a greater distance. Use the shortest and most direct venting path possible.
Excessive Wrinkling: Some dryer cycles include cool-down periods to prevent wrinkles. While this may extend the cycle time, it can help reduce wrinkling. Check your dryer settings and options to see if this feature can be adjusted.
If you’ve checked these common issues and your dryer still takes longer than expected to dry clothes, it’s advisable to consult a professional appliance technician. They can diagnose the problem more accurately, perform any necessary repairs, and ensure that the dryer is safe and efficient to use.
Q: Why is my dryer making scraping noises?
Foreign Objects in the Drum: Check the dryer drum for any foreign objects, such as coins, buttons, or small items that may have fallen out of pockets. These objects can become lodged between the drum and the dryer’s interior, causing scraping sounds. Remove any foreign objects you find.
Worn or Damaged Drum Rollers: Dryers have drum rollers that support the drum’s movement. Over time, these rollers can wear out or become damaged, resulting in scraping or squeaking noises. Inspect the drum rollers for signs of wear or damage. If they are worn, they should be replaced.
Worn or Damaged Drum Glide or Seal: Dryers may have drum glides or seals that help the drum rotate smoothly. If these components are worn or damaged, they can create friction and cause scraping noises. Inspect the drum glides and seals for wear or damage and replace them if necessary.
Belt Issues: A loose or damaged drive belt can lead to scraping sounds as it moves. Check the belt for any signs of wear, fraying, or damage. If the belt is damaged, it should be replaced.
Idler Pulley Issues: Dryers have an idler pulley that helps maintain tension on the drive belt. If the idler pulley is worn or malfunctioning, it can cause scraping noises. Inspect the idler pulley for wear or damage and replace it if needed.
Dryer Drum Support Rollers: Some dryers have additional drum support rollers. If these rollers are worn or damaged, they can create noise when the drum rotates. Check for wear or damage and replace them if necessary.
Loose or Misaligned Parts: Examine the dryer’s interior for any loose or misaligned parts that may be causing contact with the drum. Tighten or realign any loose components to eliminate the scraping noise.
Foreign Objects in the Vent or Blower: Scraping noises can also occur if foreign objects, such as lint or debris, become lodged in the dryer’s exhaust vent or blower wheel. Inspect and clean the vent and blower wheel to ensure they are clear of obstructions.
Professional Inspection: If you are unable to identify or resolve the issue on your own, or if you are uncomfortable performing dryer repairs, it’s advisable to contact a professional appliance technician. They can perform a thorough inspection, diagnose the problem, and make any necessary repairs or replacements.
Safety is paramount when working on appliances, so always unplug the dryer or turn off its power source before attempting any repairs or inspections. If in doubt, seek the assistance of a qualified technician to ensure the safe and proper repair of your dryer.
Q: My clothes don’t smell fresh at the end of the cycle.
Clean the Lint Filter and Lint Trap: A clogged lint filter and lint trap can restrict airflow, leading to inadequate drying and potential odors. Clean the lint filter before every load, and periodically clean the lint trap and the area around it.
Inspect the Drum: Check the interior of the dryer drum for any residue, lint, or odors. If you notice any buildup, clean the drum with a cloth or sponge and warm, soapy water. Ensure that the drum is dry before using the dryer.
Dryer Vent Maintenance: A blocked or partially obstructed dryer vent can lead to poor airflow, trapping moisture and odors in the dryer. Clean the vent and exhaust ductwork leading to the outside of your home regularly to prevent lint buildup.
Regularly Clean the Exhaust Hood: The exterior exhaust hood can accumulate lint and debris over time. Clean it to ensure proper ventilation and prevent blockages.
Check the Dryer Settings: Make sure you are using the appropriate heat and time settings for your laundry. Over-drying can lead to overheating and odors. Follow the manufacturer’s recommendations for specific fabric types.
Use Fabric Softener Sheets or Dryer Balls: Adding fabric softener sheets or dryer balls to your laundry can help reduce static and leave your clothes smelling fresh. Dryer balls can also help fluff and separate clothes during the drying cycle.
Avoid Overloading: Overloading the dryer with too many clothes can prevent proper airflow, resulting in damp or musty-smelling laundry. Follow the manufacturer’s guidelines for load size.
Regularly Clean the Washer: Sometimes, the issue may stem from the washing machine rather than the dryer. Make sure your washing machine is clean and free from mold or mildew buildup that can transfer odors to your clothes.
Use a High-Efficiency Detergent: If you have a high-efficiency (HE) washer, be sure to use HE detergent. Using the wrong detergent can lead to soap residue and unpleasant odors in your clothes.
Dry Clothes Promptly: Avoid leaving damp clothes in the dryer or washer for extended periods, as this can promote the growth of mold and mildew, leading to unpleasant odors.
Check for Mold or Mildew: Inspect the dryer drum, lint filter, and rubber gaskets for any signs of mold or mildew growth. If you find any, clean these areas thoroughly.
Maintain a Clean Laundry Room: Ensure that your laundry room is well-ventilated to prevent moisture buildup. If possible, leave the laundry room door open when the dryer is not in use to promote airflow.
Professional Inspection: If you’ve tried these solutions and continue to experience odor issues, consider contacting a professional appliance technician to inspect your dryer for any underlying problems.
By following these tips and regularly maintaining your dryer and laundry appliances, you can help ensure that your clothes come out of the dryer smelling fresh and clean.
Q: Why doesn’t my dryer spin well?
Overloading the Dryer: Overloading the dryer with a heavy or unevenly distributed load can strain the motor and belt, causing the drum to have difficulty spinning. Reduce the load size and redistribute the clothes evenly in the drum.
Broken or Worn Drive Belt: The drive belt is responsible for turning the drum. Over time, belts can become worn, stretched, or broken. If you hear the motor running but the drum isn’t spinning, a broken belt may be the issue. Inspect the belt for damage and replace it if necessary.
Faulty Motor: A malfunctioning or burned-out motor can prevent the drum from spinning. If the motor isn’t running or is making unusual noises, it may need to be replaced by a professional technician.
Clogged Lint Filter or Vent: A clogged lint filter or blocked exhaust vent can lead to overheating, causing the motor to shut down as a safety measure. Clean the lint filter and vent to ensure proper airflow.
Sticky Drum Glides or Rollers: The drum glides or support rollers can become sticky or worn, making it difficult for the drum to turn smoothly. Inspect these components for wear and replace them if needed.
Door Switch Malfunction: Many dryers have a door switch that prevents the drum from spinning when the door is open. If the switch is faulty or not engaging properly, it may prevent the drum from spinning. Test the door switch and replace it if necessary.
Broken Idler Pulley: The idler pulley maintains tension on the drive belt. If the pulley is damaged or worn, it can result in poor belt tension and drum rotation problems. Inspect the idler pulley and replace it if required.
Electrical Issues: Inspect the dryer’s electrical connections and fuses. A loose or damaged electrical connection or a blown fuse can prevent the dryer from operating correctly. Ensure the power cord is securely plugged in and test the outlet for power.
Timer or Control Board Issues: Malfunctions in the timer or control board can prevent the dryer from starting or advancing through the cycle properly. If you suspect an issue with these components, a professional technician can diagnose and repair them.
Professional Inspection: If you’ve checked the above components and the problem persists, or if you’re unsure about how to proceed, it’s advisable to contact a professional appliance technician. They can perform a comprehensive diagnosis to identify the root cause of the spinning issue and make any necessary repairs or replacements.
Remember to unplug the dryer or turn off its power source before attempting any repairs or inspections for safety. Troubleshooting and addressing the problem promptly can help ensure that your dryer operates efficiently and effectively.
Q: Why can’t I start my dryer?
Power Supply Issues: Check if the dryer is receiving power. Ensure that it’s plugged into a functioning electrical outlet and that the outlet itself is operational. You can test the outlet by plugging in another device or using a circuit tester.
Door Switch: Most dryers have a door switch that prevents the dryer from starting if the door is open. If the door switch is faulty or not engaging properly, it may prevent the dryer from starting. Test the door switch to see if it’s functioning correctly, and replace it if necessary.
Timer or Control Board Issues: Malfunctions in the timer or control board can prevent the dryer from starting or advancing through the cycle properly. If you suspect an issue with these components, a professional technician can diagnose and repair them.
Safety Features: Dryers often have safety features, such as thermal fuses or high-limit thermostats, that can shut down the dryer if it detects overheating. If the dryer has overheated, you may need to wait for it to cool down before it will start again. Ensure that the lint filter and vent are clean to prevent overheating.
Broken Drive Belt: If the dryer’s drive belt is broken or damaged, the dryer may not start or operate properly. Inspect the belt for damage and replace it if necessary.
Tripped Circuit Breaker: Check your home’s circuit breaker or fuse box to see if the circuit that powers the dryer has tripped or blown a fuse. Reset the breaker or replace the fuse if needed.
Stuck Start Button or Control Knob: Examine the start button or control knob for any physical damage or debris that may be preventing it from engaging properly. If the button or knob is damaged, it may need to be replaced.
Thermal Fuse: Some dryers have a thermal fuse that can blow if the dryer overheats. This fuse is a safety feature to prevent fires. If the thermal fuse is blown, the dryer will not start. Check the thermal fuse and replace it if necessary.
Child Lock: Some dryers have a child lock feature that can prevent the dryer from starting. Check the user manual for your specific dryer model to learn how to enable or disable this feature.
Professional Inspection: If you’ve checked the above components and the dryer still won’t start, or if you’re unsure about how to proceed, it’s advisable to contact a professional appliance technician. They can perform a comprehensive diagnosis to identify the root cause of the problem and make any necessary repairs or replacements.
Remember to prioritize safety by unplugging the dryer or turning off its power source before attempting any repairs or inspections. Troubleshooting and addressing the problem promptly can help you get your dryer up and running again.
Q: Why is my dryer not drying properly?
Clogged Lint Filter: A clogged lint filter can restrict airflow, leading to longer drying times and damp clothes. Clean the lint filter before every load to ensure proper airflow.
Blocked Vent or Duct: A blocked or partially obstructed exhaust vent or duct can hinder the release of hot, moist air from the dryer. Check the vent and duct for obstructions and ensure they are clear and unobstructed.
Overloading the Dryer: Overloading the dryer with too many clothes can prevent proper airflow and lead to incomplete drying. Reduce the load size and redistribute the clothes evenly in the drum.
Incorrect Heat Settings: Ensure that you are using the appropriate heat and time settings for your laundry. Using low heat settings for heavy or bulky items can prolong drying times.
Faulty Heating Element (Electric Dryers): If the heating element is malfunctioning or damaged, it can result in inadequate heating, causing the dryer to run longer. A professional technician can test the heating element and replace it if necessary.
Cool or Cold Ambient Temperature: Drying times can be longer in cooler or colder environments. Make sure the room where the dryer is located is adequately heated, as this can affect the efficiency of the dryer.
Vent Length and Ductwork: Longer exhaust venting systems and complex ductwork can result in increased drying times, as the air must travel a greater distance. Use the shortest and most direct venting path possible.
Excessive Wrinkling: Some dryer cycles include cool-down periods to prevent wrinkles. While this may extend the cycle time, it can help reduce wrinkling. Check your dryer settings and options to see if this feature can be adjusted.
Inspect the Door Seal: Check the door seal for any signs of wear or damage. A damaged seal can allow heat to escape, affecting the dryer’s ability to heat effectively. Replace the seal if necessary.
Professional Inspection: If you’ve tried the above steps and the problem persists, or if you’re unsure about how to proceed, it’s advisable to contact a professional appliance technician. They can perform a comprehensive diagnosis, identify the root cause of the drying issue, and make any necessary repairs or replacements.
Regular maintenance and prompt attention to drying problems can help ensure that your dryer operates efficiently and effectively.
Q: Should I continue using my dryer if I notice a problem?
Safety First: Safety should be your top priority. If you notice any signs of a potential safety hazard, such as strange odors, unusual sounds, smoke, sparks, or visible damage to the appliance, immediately stop using the dryer. Unplug it from the electrical outlet or disconnect it from the gas supply if applicable. Continuing to use a dryer that poses a safety risk can lead to serious accidents, including fires.
Basic Maintenance and Troubleshooting: For minor issues that do not pose an immediate safety risk, such as a clogged lint filter or a slightly longer drying time, it’s generally safe to continue using the dryer while you address the problem. Perform basic maintenance tasks like cleaning the lint filter, lint trap, and exhaust vent to improve efficiency.
Seek Professional Help: If the problem persists or if you’re unsure about the cause of the issue, it’s advisable to contact a professional appliance technician for a thorough inspection and repair. Some dryer problems may worsen over time if left unaddressed, and continuing to use the dryer can lead to further damage.
Monitor the Dryer: If you’re uncertain about the severity of the issue, you can monitor the dryer during operation. Pay attention to any unusual noises, burning smells, or erratic behavior. If you notice anything out of the ordinary, stop using the dryer and consult a technician.
Preventive Maintenance: Regular preventive maintenance can help you identify and address issues before they become major problems. Cleaning the lint filter, lint trap, and exhaust vent regularly, as well as inspecting the dryer drum and seals, can contribute to the safe and efficient operation of the appliance.
User Manual: Refer to the user manual or manufacturer’s guidelines for specific recommendations on troubleshooting and safety procedures for your dryer model.
In summary, prioritize safety when dealing with dryer issues. Stop using the dryer immediately if you suspect a safety hazard, and consult a professional technician for a thorough inspection and repair. For minor problems that do not pose immediate risks, you can continue to use the dryer while taking steps to address the issue and improve its performance. Regular maintenance and prompt attention to problems can help ensure the safe and efficient operation of your dryer.
Q: What if my dryer breaks again after a few days or weeks?
Contact the Repair Service: If the dryer was recently repaired by a professional technician, contact the repair service that performed the initial repair. Inform them about the recurring problem and provide details about when and how it occurred. The repair service may offer a warranty or guarantee on their work, and they may return to address the issue at no additional cost.
Verify Warranty Coverage: Check if your dryer is still under warranty, either from the manufacturer or the repair service. Warranty coverage can vary, but it typically includes parts and labor for a specific period. If the dryer is under warranty, the repair may be covered, and you may not incur additional costs.
Document the Problem: Keep records of the issues you encounter, including the date, time, and nature of each problem. Detailed documentation can help when discussing the problem with repair technicians or manufacturers.
Seek a Second Opinion: If you are unsatisfied with the service provided by the initial repair technician or if the problem persists after multiple attempts at repair, consider seeking a second opinion from a different repair service. A fresh perspective may help identify and resolve the underlying issue.
Consider a Replacement: If your dryer experiences recurring problems and is no longer under warranty, you may need to evaluate whether it makes more sense to invest in a new dryer rather than continuing to repair the old one. Newer models may be more energy-efficient and reliable.
Appliance Maintenance: After addressing the issue, prioritize regular maintenance for your dryer to prevent future problems. Clean the lint filter, lint trap, and exhaust vent regularly, and follow the manufacturer’s guidelines for care and maintenance.
Manufacturer Support: Contact the manufacturer’s customer support for guidance and information regarding common issues with your specific dryer model. They may be able to provide troubleshooting tips or direct you to authorized repair centers.
Extended Warranty: If you purchase a new dryer, consider whether an extended warranty or service plan is worth the investment. Extended warranties can provide additional coverage and peace of mind against future breakdowns.
Remember that appliances can experience wear and tear over time, and even with regular maintenance, they may eventually require replacement. When choosing a new dryer, research different models, read reviews, and consider energy efficiency ratings to make an informed decision on a replacement that suits your needs and budget.
Q:What can I do to facilitate faster dryer repairs?
Document the Problem: Before contacting a repair service, document the issue you’re experiencing with your dryer. Provide as much detail as possible, including when the problem started, any error codes displayed, and any unusual noises or behaviors.
Gather Information: Be ready with important information about your dryer, including the make and model number, serial number, and the date of purchase. This information can help the repair technician identify the correct parts and manuals needed for the repair.
Check for Warranty: Determine if your dryer is still under warranty, either from the manufacturer or a previous repair service. Warranty coverage may impact repair costs and eligibility for free or discounted repairs.
Schedule Promptly: As soon as you notice a problem with your dryer, contact a reputable repair service to schedule an appointment. Early scheduling can help you secure a convenient time slot and potentially reduce downtime.
Provide Access: Ensure that the repair technician has easy access to the dryer. Clear any obstacles or clutter around the appliance so that they can work efficiently.
Ask Questions: During the repair appointment, don’t hesitate to ask questions or seek clarification from the technician. Understanding the issue and the repair process can help you make informed decisions and ensure that the repair is completed correctly.
Follow Maintenance Recommendations: After the repair is completed, ask the technician for maintenance tips and recommendations to prevent future issues. Proper maintenance can extend the lifespan of your dryer and reduce the need for frequent repairs.
Consider Preventive Maintenance: Periodically schedule preventive maintenance for your dryer, even when it’s not experiencing problems. Preventive maintenance can identify and address potential issues before they become major problems.
Keep Records: Maintain records of all repairs, including invoices, receipts, and warranty information. These records can be useful for future reference and warranty claims.
Explore Repair Plans: Some repair services offer maintenance plans or service contracts for ongoing appliance care. These plans can provide regular checkups and maintenance, potentially reducing the likelihood of breakdowns.
Evaluate Replacement: If your dryer experiences frequent breakdowns or becomes costly to repair, consider whether it’s more cost-effective to invest in a new, energy-efficient model. Newer appliances may be covered by warranties and offer improved performance.
By taking these proactive steps, you can help facilitate faster dryer repairs and ensure that your appliance is back in working condition as soon as possible. Additionally, regular maintenance and care can contribute to the longevity of your dryer and reduce the frequency of repairs.
Q: What if my dryer needs a new part?
Contact a Professional Repair Service: One of the most common and reliable options is to contact a professional appliance repair service. They can diagnose the issue, identify the specific part that needs replacement, and order the correct part for your dryer model. A qualified technician can then install the new part and ensure that it’s functioning correctly.
Order the Part Yourself: If you are comfortable with DIY repairs and have some experience working with appliances, you can order the replacement part yourself. To do this:
Identify the model number of your dryer. You can typically find this information on a label inside the dryer door or on the back of the appliance.
Look up the part number for the component you need. You can often find this information in the dryer’s user manual or by searching online using your model number.
Purchase the replacement part from an authorized appliance parts dealer, an online retailer, or the manufacturer’s website.
Follow the installation instructions provided with the part or refer to repair manuals or online resources for guidance.
Exercise caution and ensure you have the necessary tools and skills to safely complete the repair.
Consult the Manufacturer: If your dryer is still under warranty or you prefer to have the manufacturer handle the repair, contact the manufacturer’s customer service or support center. They can guide you through the warranty process, provide information on authorized service providers, or assist with ordering genuine replacement parts.
Consider Aftermarket Parts: While genuine OEM (Original Equipment Manufacturer) parts are recommended for optimal performance and compatibility, you may also find aftermarket or third-party replacement parts. These parts can be more affordable but may vary in quality and compatibility. Ensure that any aftermarket parts you choose are compatible with your specific dryer model.
Seek Professional Advice: If you’re unsure about the type of part your dryer needs or the compatibility of replacement options, consult with a professional technician or repair service. They can provide guidance on selecting the right part and ensure that it’s installed correctly.
Before attempting any dryer repairs, prioritize safety by unplugging the dryer or disconnecting it from the electrical or gas supply. If you are uncertain about your ability to perform the repair safely and correctly, it’s advisable to seek professional assistance. Incorrect installation of replacement parts can lead to further damage and safety hazards.
Q: Will my dryer be repaired on the spot?
Simple Repairs: For minor issues that do not require special parts or extensive diagnostic work, a repair technician may be able to complete the repair on the spot during the initial service call. Examples of such repairs include unclogging vents, replacing a blown thermal fuse, or fixing a loose electrical connection.
Availability of Parts: If the technician determines that your dryer needs a specific replacement part, the ability to repair it on the spot depends on whether they have the required part readily available. Some repair services carry common replacement parts in their service vehicles for quick repairs. However, less common or specialized parts may need to be ordered, which can delay the repair.
Diagnosis and Assessment: In some cases, the technician may need to diagnose the issue, order the necessary parts, and schedule a follow-up appointment to complete the repair. This is common for more complex or less common problems that require additional troubleshooting or specialized parts.
Safety and Efficiency: Safety and quality are top priorities for repair technicians. They may prioritize performing a thorough and accurate repair over completing it on the spot. Rushing a repair can lead to mistakes or missed issues, potentially causing further problems down the line.
Manufacturer Warranty: If your dryer is still under manufacturer warranty, the repair may be completed by an authorized technician according to the manufacturer’s policies and procedures. This process may involve ordering specific parts and scheduling follow-up appointments as needed.
Technician’s Experience: The experience and expertise of the repair technician can also affect the likelihood of on-the-spot repairs. Highly skilled technicians may be more efficient at diagnosing and fixing issues quickly.
Preventive Maintenance: If you schedule regular preventive maintenance for your dryer, technicians can identify and address potential issues before they become major problems, reducing the need for extensive repairs.
When scheduling a repair service for your dryer, it’s a good idea to discuss the nature of the problem with the technician and inquire about the expected timeline for the repair. If a part needs to be ordered, ask for an estimated delivery time and follow-up appointment. Additionally, inquire about any warranty or guarantee that may apply to the repair work.
Keep in mind that safety, quality, and long-term reliability should be the primary considerations when having your dryer repaired, and some repairs may take more time to ensure they are done correctly.
Dryer Maintenance Tips
Track your average drying time
Choose a Baseline Load: Select a typical load of laundry that you frequently dry in your dryer. It’s important to use the same type and size of load for consistency.
Measure the Initial Drying Time: Start the drying cycle as you normally would, and use a timer (e.g., a smartphone timer or a kitchen timer) to measure the initial drying time from the moment you start the dryer until the cycle completes.
Record the Data: Create a simple log or spreadsheet to record the drying times for each load. Include the date, type of load (e.g., cotton towels, synthetic fabrics), and any specific settings you used (e.g., heat level, cycle type).
Repeat the Process: Continue tracking the drying times for several loads over a period of time. The more data points you collect, the better you can establish an average drying time.
Calculate the Average: To calculate the average drying time, add up all the individual drying times you recorded and divide by the number of loads. For example:
Average Drying Time = (Sum of Drying Times) / (Number of Loads)
Monitor for Changes: Regularly update your log to track any changes in the average drying time. If you notice a significant increase in drying time, it may indicate an issue with your dryer that requires attention.
Perform Maintenance: If your dryer’s average drying time consistently increases or if you notice a decline in performance, perform basic maintenance tasks like cleaning the lint filter, lint trap, and exhaust vent. Additionally, check for any visible issues such as damaged seals, worn belts, or unusual noises.
Seek Professional Assistance: If your dryer’s performance continues to decline or if you encounter persistent issues despite maintenance efforts, consider contacting a professional appliance technician for a thorough inspection and repair.
By tracking your average drying time, you can stay proactive about your dryer’s maintenance and performance. This can help you address problems early, improve energy efficiency, and extend the lifespan of your appliance.
Regularly vacuum your dryer
Materials You’ll Need:
A vacuum cleaner with a hose attachment and crevice tool
A soft brush or a lint brush (optional)
A flashlight (optional)
Steps to Vacuum Your Dryer:
Safety First: Before starting, ensure that the dryer is unplugged or disconnected from its power source for safety.
Remove Lint Screen: Begin by removing the lint screen or lint filter from the dryer. Clean the lint off the screen by hand and set it aside.
Inspect the Lint Screen Compartment: Use the flashlight to inspect the lint screen compartment or housing. Look for any lint or debris that may have accumulated inside. If you see lint buildup, use the hose attachment and crevice tool of your vacuum cleaner to gently remove the lint from the compartment. Be careful not to damage the components.
Vacuum the Drum: Open the dryer door and use the hose attachment to vacuum the inside of the drum. Pay attention to the interior seams, edges, and crevices where lint can accumulate. Use a soft brush or lint brush to loosen any stubborn lint if needed. Make sure you remove all visible lint from the drum.
Vent and Exhaust Duct: Disconnect the dryer vent or exhaust duct from the back of the dryer. Inspect the vent for lint buildup and any obstructions. Vacuum the inside of the vent using the hose and crevice tool. If your vent duct is long, consider using a dryer vent cleaning kit to reach deeper into the duct.
Behind the Dryer: Move the dryer away from the wall and vacuum behind and around it. Dust and lint can accumulate on the floor and wall surfaces, so it’s essential to keep this area clean to prevent potential fire hazards.
Reassemble and Test: After vacuuming, reassemble the dryer by attaching the vent duct securely and replacing the lint screen. Plug the dryer back in or reconnect its power source.
Regular Maintenance: Make vacuuming your dryer a part of your regular appliance maintenance routine. Aim to do this at least every six months, or more often if you notice excessive lint buildup or reduced drying efficiency.
Properly vacuuming your dryer helps prevent lint buildup, which can obstruct airflow and pose a fire risk. It also contributes to more efficient drying and extends the life of your dryer. Additionally, remember to clean the lint screen before every load of laundry to further reduce lint accumulation.
Clear your outside dryer cover
Materials You’ll Need:
Screwdriver (if necessary)
A flashlight
A vacuum cleaner with a hose attachment
A brush or lint brush (optional)
A ladder (if the vent is high)
Steps to Clear Your Outside Dryer Vent Cover:
Safety First: Ensure the dryer is turned off and unplugged or disconnected from its power source for safety.
Locate the Outside Vent Cover: Go outside to where the dryer vent terminates. This is usually on an exterior wall or through the roof. Locate the vent cover, which is typically a louvered or slotted grille.
Remove the Vent Cover (if necessary): Some vent covers are secured with screws, while others may be attached using clips or simply slide in place. Use a screwdriver or follow the manufacturer’s instructions to remove the cover. Be careful not to damage it during removal.
Inspect the Vent Cover: Examine the vent cover for any visible lint, debris, or obstructions. Shine a flashlight into the vent to get a clear view of the inside.
Clear Debris: Use a brush, lint brush, or your hand to clear away any lint or debris that may be blocking the vent. Be thorough in removing any buildup.
Vacuum the Vent: Attach the hose of your vacuum cleaner to the outside of the vent to capture any loose lint and debris. Move the hose in and out to reach as far into the duct as possible.
Reattach or Replace the Vent Cover: If you removed the vent cover, reattach it securely. Make sure it is properly aligned and sealed to prevent any gaps or drafts.
Test the Dryer: Plug the dryer back in or reconnect its power source and turn it on to test the airflow. You should feel a strong, consistent flow of air at the vent exit. If the airflow is weak or irregular, there may still be an obstruction that needs further attention.
Regular Maintenance: Make clearing the outside dryer vent cover part of your regular maintenance routine. How often you do this depends on factors like usage and the type of laundry you dry, but aim to check it at least once every six months.
Clearing the outside dryer vent cover is essential to prevent lint buildup that can restrict airflow and pose a fire hazard. Proper maintenance helps your dryer operate efficiently and safely. If you’re uncomfortable doing this task yourself, consider hiring a professional dryer vent cleaning service to ensure it’s done correctly.
Clean the exhaust vent every two years
Materials You’ll Need:
Screwdriver
Vacuum cleaner with a hose attachment
Vent brush or lint brush
Dryer vent cleaning kit (optional, but recommended)
Steps to Clean the Exhaust Vent:
Safety First: Before starting, ensure that the dryer is turned off and unplugged or disconnected from its power source for safety.
Pull the Dryer Away: Carefully pull the dryer away from the wall, creating enough space to access the vent duct.
Unplug or Disconnect the Vent: Depending on your dryer’s vent configuration, disconnect the vent duct from the back of the dryer. This may involve loosening clamps or removing screws. If the vent duct is rigid or semi-rigid, detach it from the wall as well. If it’s a flexible duct, you may need to disconnect it from both the dryer and the wall.
Inspect the Vent Duct: Examine the interior of the vent duct for lint buildup, debris, or obstructions. Shine a flashlight into the duct to get a clear view of the inside.
Use a Vent Brush or Lint Brush: Insert a vent brush or lint brush into the vent duct to dislodge and remove lint and debris. Push the brush in as far as you can, and then pull it out slowly. Repeat this process several times until you’ve removed as much lint as possible. Be gentle to avoid damaging the duct.
Vacuum the Duct: Attach the hose of your vacuum cleaner to the end of the vent duct to capture any loose lint and debris. Move the hose in and out to reach as far into the duct as possible.
Reconnect the Vent Duct: Reattach the vent duct to the dryer and the wall, ensuring it’s properly sealed and secured. If your duct is flexible, avoid any kinks or sharp bends that can restrict airflow.
Push the Dryer Back: Carefully push the dryer back into its original position, ensuring it’s level and stable.
Test the Dryer: Plug the dryer back in or reconnect its power source and turn it on to test the airflow. You should feel a strong, consistent flow of air at the vent exit.
Regular Maintenance: Make cleaning the exhaust vent part of your regular maintenance routine, ideally every two years or more frequently if you notice reduced drying efficiency or airflow.
In addition to this regular maintenance, remember to clean the lint filter before every load of laundry and clear the outside dryer vent cover periodically to prevent lint buildup. Proper maintenance helps your dryer operate efficiently, extends its lifespan, and reduces the risk of fire hazards associated with lint accumulation in the vent duct.
Don’t overload your dryer
Sort Your Laundry: Separate your laundry into loads based on fabric type, weight, and drying needs. For example, dry heavy towels separately from lightweight clothing.
Leave Room for Movement: When loading the dryer, leave enough space for clothes to tumble freely without cramming them in. Overcrowding can lead to inefficient drying.
Use Dryer Balls or Wool Balls: Consider using dryer balls or wool balls to help improve airflow and reduce drying time by separating clothes and reducing wrinkles.
Check Clothing Labels: Pay attention to care labels on your clothing to ensure you’re using the correct drying temperature and cycle settings.
Regular Maintenance: Keep the lint filter and lint trap clean before each use to maintain proper airflow and prevent lint buildup.
By following these guidelines and avoiding overloading your dryer, you can achieve better drying results, reduce energy consumption, and extend the lifespan of your appliance while maintaining the safety of your laundry routine.
Clean lint buildup from the dryer vent
1. Safety First:
Before starting, turn off and unplug the dryer or disconnect it from its power source.
Ensure that the dryer is completely cool before beginning the cleaning process.
2. Gather the Necessary Tools:
You’ll need a few tools for this task, including a screwdriver, vacuum cleaner with a hose attachment, vent brush or lint brush, and work gloves (optional).
3. Locate the Dryer Vent:
Find the exterior dryer vent where it exits your home, typically on an exterior wall or through the roof. It may also exit through a crawl space or attic.
4. Remove the Vent Cover (if applicable):
Some vent covers are secured with screws, while others may be attached using clips or simply slide in place. Use a screwdriver or follow the manufacturer’s instructions to remove the cover. Be careful not to damage it during removal.
5. Inspect the Vent:
Examine the exterior of the vent for any visible lint, debris, or obstructions. Shine a flashlight into the vent to get a clear view of the inside.
6. Clear Debris:
Use a brush, lint brush, or your hand (wearing gloves) to clear away any lint or debris that may be blocking the vent. Be thorough in removing any buildup.
7. Use a Vent Brush or Lint Brush:
Insert a vent brush or lint brush into the vent to dislodge and remove lint and debris. Push the brush in as far as you can, and then pull it out slowly. Repeat this process several times until you’ve removed as much lint as possible. Be gentle to avoid damaging the vent.
8. Vacuum the Vent:
Attach the hose of your vacuum cleaner to the outside of the vent to capture any loose lint and debris. Move the hose in and out to reach as far into the vent as possible.
9. Reattach the Vent Cover:
If you removed the vent cover, reattach it securely. Make sure it is properly aligned and sealed to prevent any gaps or drafts.
10. Test the Dryer:
Plug the dryer back in or reconnect its power source and turn it on to test the airflow. You should feel a strong, consistent flow of air at the vent exit.
11. Regular Maintenance:
Make cleaning the dryer vent part of your regular maintenance routine, ideally every two years or more frequently if you notice reduced drying efficiency or airflow.
Regularly cleaning lint buildup from the dryer vent is essential to maintain efficient dryer operation and prevent safety hazards. If you’re uncomfortable performing this task yourself, consider hiring a professional dryer vent cleaning service to ensure a thorough and safe cleaning process.
Clean your dryer lint screen or filter before you run it
Materials You’ll Need:
Your dryer’s lint screen or filter
Your hand or a lint brush (optional)
Steps to Clean Your Dryer Lint Screen:
Safety First:
Ensure that the dryer is turned off and unplugged or disconnected from its power source for safety.
Allow the dryer to cool down if it has been recently used.
Locate the Lint Screen or Filter:
Open the dryer door and locate the lint screen or filter. It is usually located inside the door frame or on top of the dryer drum.
Remove the Lint Screen:
Gently pull the lint screen out of its housing or slot. It may be a pull-out style or a lift-up style, depending on your dryer model.
Inspect the Lint Screen:
Examine the lint screen for any visible lint or debris. Use your hand or a lint brush to remove any lint that is clinging to the screen. Be thorough in cleaning it.
Clean the Screen:
Hold the lint screen under a light source, such as a window or a lamp, to check for any tiny lint particles or residue that may be trapped in the screen’s mesh. If you see any, use a lint brush or your fingers to remove them.
Reinsert the Lint Screen:
Once the lint screen is clean, slide it back into its housing or slot. Ensure that it is properly seated and secured.
Test the Dryer:
Plug the dryer back in or reconnect its power source and turn it on to test its operation. A clean lint screen helps maintain proper airflow and drying efficiency.
Additional Tips:
Make it a habit to clean the lint screen before every load of laundry to prevent lint buildup and ensure safe and efficient drying.
Occasionally, wash the lint screen with warm, soapy water to remove any fabric softener residue or dryer sheet buildup. Allow it to dry completely before reinserting it into the dryer.
Cleaning the lint screen before each use is a simple yet effective way to reduce the risk of lint-related fires, improve drying performance, and extend the life of your dryer. It’s an important step in dryer maintenance that should not be overlooked.