647-303-4997
warranty
We want to be your first choice when you need a repair for an appliance. We’re confident you will love our service
toprated
We maintain a commitment to the highest standards of professionalism
twentyfiveyears
Don’t hesitate for another minuter. If your appliance needs repair or maintenance.

Stove Repair

FREE Service Call with any Repair.

Licensed Experience in Service

MAAR24 Appliance Repair offers reliable, same day Electric Stove Repair ! Residential appliance ONLY. Our customer support center is open 7 days a week to assist you in booking a service call.
Call NOW 647-303-4997
Fridge Repair Services
LowPrice
Affordable Price We pride ourselves that we can offer competitive low prices. FREE service call with repair this is a $25.00 value
professionalService
Certified Technicians Our technicians received many hours of factory training to repair your appliances as quickly as possible
twentyfiveyears
More Than 25 Years We offer high quality services to save your time and money and to repair your appliances as quickly as possible and in the best manner possible.
ReplacementParts
Genuine Parts Replacements We use genuine replacement parts for optimal performance, Avoid the costly risk of breakdowns installing non-genuine parts and generic products
satisfaction
High Quality Services We offer high quality services tailored to save your time and money in the best manner possible. Our standard is excellence
garantia
Customer Satisfaction Guaranteed We believe our customers should treated fairly and respectfully as well as provide for excellence towards any service

Quick and professional stove and oven repair from experts

Our expert fixing company will not let your stove and oven down. We are leading in fixing kitchen appliances of all types. If you want to get your stove and oven operating at the best level, just contact our repair specialists and let a team of certified technicians fix and improve any kitchen unit for your needs. Whether you need quick stove repair, smart range fixing or cooktop restore we are ready to rapidly deliver the best service to you.

The team of fixers you can trust. You are going to cook a meal and your stove and oven faults? Do you want to your kitchen appliances up and operating smoothly at the earliest opportunity? Our appliances fixing company is recognizable for quick and cost-efficient repair services and smart solutions in the Ontario region. Our 24/7 call center make sure our attentive and friendly customer managers to immediately react to each call.

Sophisticated equipment and excellent training are the keys to our success. Equipped with the newest technology hardware our trained stove repairmen provide high-quality standard services on inspecting, malfunction finding, maintenance and tech guidance for your stove, range, and oven. Make no mistake while opting our team of dedicated specialists as your reliable fix partner for all residential needs. We ensure your full satisfaction.

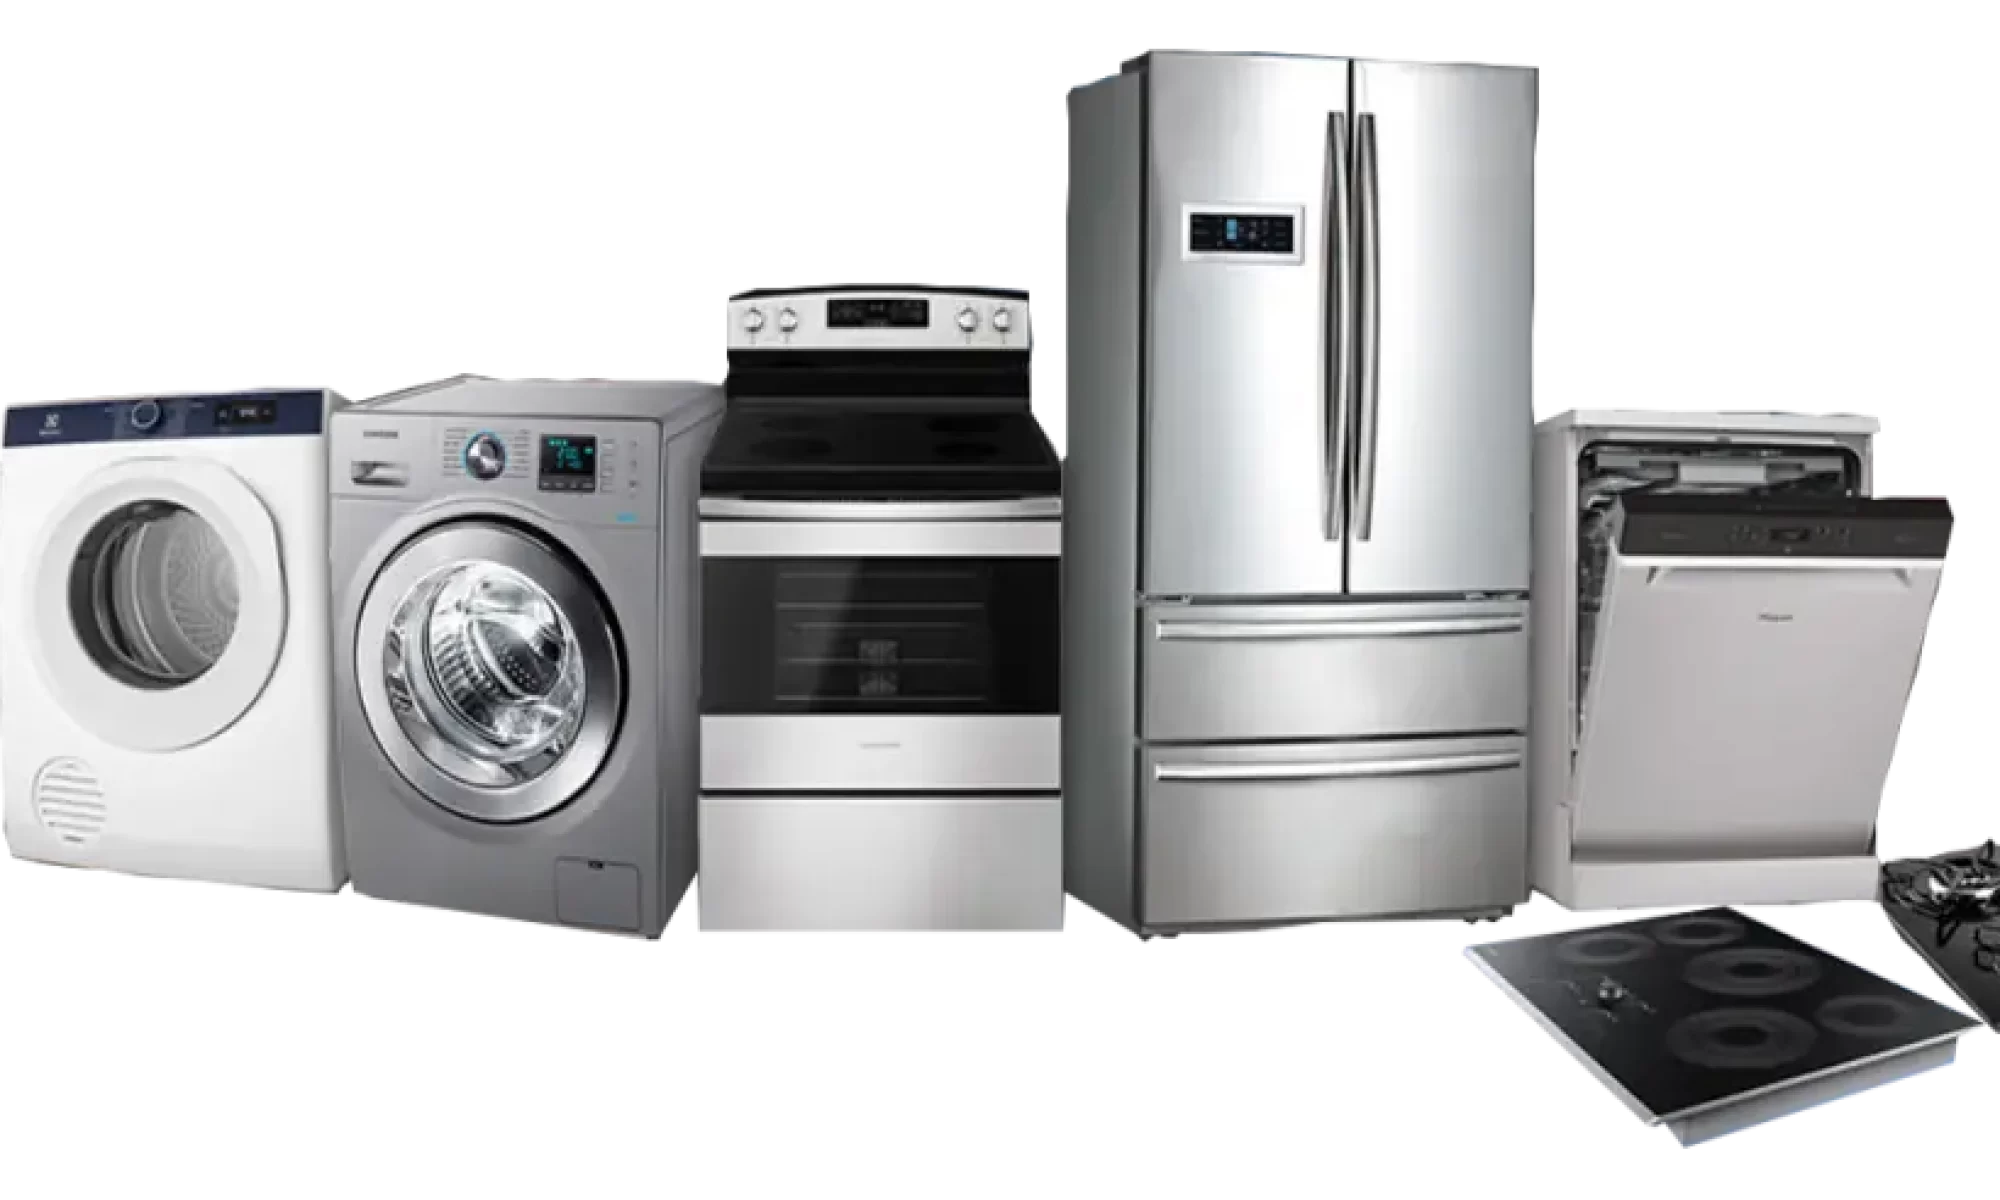
Modern kitchen appliances. The cooking appliance is a center of the kitchen space, therefore, the one should find an option that will satisfy its needs and perform multiple tasks and functions. Nowadays, modern manufacturers offer to purchase devices that perform multiple tasks. Among them are gas and electric operated cooking ranges, steam ovens, built-in ovens, and induction cooktops.

The most recurrent problems with stoves, ranges, and ovens. If your kitchen devices start to malfunctioning causing troubles to you and your family, turn to pros will be the best solution to the problem. Counting on us, you may be certain that your range, stove, and the oven will be in the best operating condition for all your kitchen activities. Our professional team of stove repair techs has identified the most frequent faults that your stove and oven, both electric and gas running, suffer from:

  • constant sparking of burners;
  • the stove doesn’t power on/off;
  • slow preheating of the device;
  • the door of the oven doesn’t’ unlock;
  • no light;
  • incorrect temperature;
  • uneven cooking in the oven;
  • the device periodically shutting down while cooking;
  • overheating or low heat.

These drawbacks can be easily removed by our skilled repairmen. We repair all major brands and models so that all devices will get the necessary maintenance and professional support. Our technicians provide technical assistance and repairs at any part of the Ontario region 24 hours a day, 7 days a week.

An easy process of appointment scheduling. Adjustable booking system enables any customer to schedule oven repair appointment with one of the experienced repairmen easy and quickly. That’s why, you select the best day, time, and place for fixing procedures for your electrical and gas operating stove and oven. Appreciating your time we offer the most affordable and convenient repair conditions.

Why Trust and Choose Us for Oven,Stove Repair?

Fully licensed and insured
Over 7 years of experience fixing appliances throughout in Canada
Up to 3 month Warranty
Experienced in all Oven,Stove models
Available for same-day service

oven repair
oven repair man
oven repair near me
oven repair service
oven stove repair prices
stove repair
stove repair man
stove repair near me
stove repair service


Same-Day Oven&Stove Repair for Every Canadian Lifestyle

Your life is busy. We understand that. MAAR24 Appliance Repair honours and respects the Canadian way of life, which is why we offer same-day Oven&Stove repairs. We stand behind our dedication to quality work and swift repairs for all of our clients any Area!


Oven&Stove Error Codes

Error codes in ovens and stoves are alphanumeric or numeric codes that are displayed on the appliance’s control panel or digital display to indicate a specific problem or issue. These codes are designed to help diagnose and troubleshoot problems with the appliance, making it easier for homeowners and technicians to identify and fix issues. Error codes can vary depending on the brand and model of the oven or stove, and they may include:

F1 – F9 Codes: These are common error codes used in many ovens. The specific meaning of each code can vary depending on the appliance manufacturer. Common F codes include F1 (usually related to a malfunctioning oven control board), F2 (often indicating a temperature sensor or oven control issue), and so on up to F9.

E Codes: E codes are commonly used in ovens and stoves and typically indicate electronic control or sensor-related issues. For example, E0 or E1 might indicate a keypad or control board problem.

C Codes: These codes are often related to problems with the oven’s internal temperature sensors. For example, C0 or C1 may indicate an issue with the temperature sensor.

H Codes: H codes are used in some ovens to indicate heating element or temperature-related issues. For instance, H1 may mean a problem with the broil element.

L Codes: L codes are often used for issues related to the oven’s lock mechanism, which is typically associated with self-cleaning cycles. An L code, such as L1, may indicate a lock motor issue.

S Codes: S codes are often used for oven control or user interface issues. S1, for example, might indicate a problem with the touchpad or user interface board.

Other Numeric Codes: Some appliances use numeric error codes without letters. These codes can vary significantly between brands and models, so the manufacturer’s user manual is usually the best resource for understanding their meanings.

Fault Descriptions: In some cases, the error code may be accompanied by a brief description of the fault. This description can provide additional information about the problem.

It’s important to note that the meaning of error codes can vary from one brand and model of oven or stove to another. Therefore, it’s essential to consult the appliance’s user manual or contact the manufacturer’s customer support or service department for specific information about the error codes on your appliance.

When you encounter an error code, it’s often recommended to try resetting the appliance first, as it may be a temporary issue. If the error code persists, or if you’re unsure about its meaning or how to address it, it’s best to seek professional assistance from a technician who is experienced with your specific oven or stove model.


MAAR24™ Appliance Repair Process

Different brands have different issues and that is why our technicians are trained to repair the major brands. Professional repair will save you money in the long run because it is cheaper to repair your Oven&Stove as opposed to buying a new one.


Q: How soon will my oven be repaired?

A: We always do everything possible to complete oven repairs within our first visit. Our team arrives with all the necessary equipment and various parts in order to ensure MAAR24 repairs.


Q: Are your oven repairs guaranteed?

A: All of our oven repairs are covered by our satisfaction guarantee. If your oven experiences the same problem after we have completed repairs, contact our team immediately for urgent service.


Q: How quickly technician to arrive?

A: We do our utmost to arrive within 3 hours of you making that call. We understand how important your household appliances are and we treat each case as urgent.


Q: Can I continue using my oven if it’s running too hot or cold?

A: Using an oven that is running too hot or too cold can be problematic because it can lead to cooking and safety issues. Here’s why it’s important to address temperature problems and what you can do:

Running Too Hot:

If your oven is running hotter than the set temperature, it can cause several issues:

Overcooking: Your food may cook too quickly, resulting in overcooked or burned dishes.

Inaccurate Cooking Times: Recipes rely on specific cooking temperatures and times. When your oven runs hotter, these times may not be accurate, leading to unpredictable results.

Safety Concerns: Cooking at excessively high temperatures can create a fire hazard, especially if grease or food particles accumulate in the oven.

Running Too Cold:

If your oven is running colder than the set temperature, it can also cause problems:

Undercooking: Your food may not cook thoroughly or evenly, which can lead to food safety concerns and undercooked dishes.

Extended Cooking Times: Recipes will take longer to cook at lower temperatures, which can be inconvenient and may result in dried-out or overcooked food.

Inaccurate Baking: Baking requires precise temperatures for items like cakes, bread, and pastries. An oven running too cold can lead to baking failures.


Q: Why won’t the oven door open after self-cleaning?

A: If your oven door won’t open after a self-cleaning cycle, it can be due to several reasons. Here are some common causes and steps to resolve the issue:

Safety Lock Feature: Many ovens have a safety lock mechanism that prevents the door from opening during and immediately after a self-cleaning cycle to protect you from the high temperatures inside. This lock may remain engaged until the oven has cooled to a safe temperature.

Solution: Wait for the oven to cool down completely. This can take several hours. You can try turning the oven off at the circuit breaker or unplugging it for a few minutes to reset the lock. Once the oven has cooled and the lock is disengaged, the door should open.

Timer Not Reset: Sometimes, the oven’s electronic control panel may still display a “self-cleaning” or “locked” message after the self-cleaning cycle has completed, which can prevent the door from opening.

Solution: Cancel the self-cleaning cycle by pressing the “Cancel” or “Clear” button on the oven’s control panel. If that doesn’t work, turn off the oven at the circuit breaker for a few minutes to reset it. After resetting, try opening the door again.

Oven is Still Hot: If the oven is still hot, it’s normal for the door to remain locked until it cools down to a safe temperature.

Solution: Wait for the oven to cool down completely, which can take a few hours. Attempting to force the door open while the oven is hot can be dangerous.

Mechanical Issue: In some cases, a mechanical issue with the oven’s locking mechanism or latch can prevent the door from opening.

Solution: If none of the above solutions work, or if you suspect a mechanical issue, it’s best to contact a professional appliance technician to inspect and repair the oven. Attempting to force the door open yourself can cause damage or create safety hazards.

It’s important to note that the self-cleaning cycle generates extremely high temperatures to burn off food residues and grease, and the oven door is designed to stay locked until it’s safe to open. Always prioritize safety when dealing with a locked oven door after self-cleaning and avoid any attempts to force it open. If you’re unsure how to proceed or if the issue persists, seek professional help to avoid potential damage to the oven or injury.


Q: How do I find the model and serial number of my oven?

A: Finding the model and serial number of your oven is important for various purposes, such as warranty claims, ordering replacement parts, or seeking assistance with repairs or troubleshooting. The location of these numbers can vary depending on the oven’s make and model, but here are some common places to look:

Inside the Oven Door Frame: Open the oven door and look around the frame. The model and serial number may be located on a sticker or a metal plate attached to the frame. It’s usually visible when you open the door.

On the Oven’s Rear or Side Panel: In some cases, you may find the model and serial numbers on the back or side of the oven. You may need to move the oven slightly to access this information.

In the Owner’s Manual: The owner’s manual that came with your oven often contains a section that includes the model and serial numbers. If you have the manual, check there.

On a Label Near the Power Cord: If your oven has a power cord, there may be a label with the model and serial numbers attached near the cord’s entry point into the oven.

Behind the Control Panel: On some ovens, especially wall ovens or those with digital control panels, you may need to remove the control panel to access the model and serial number.

Inside the Storage Drawer or Kick Plate: On some models, you might find a label with this information beneath the storage drawer or behind the oven’s kick plate.

On the Rear or Bottom of the Oven (Not Common): In a few cases, particularly for older ovens, you may find the model and serial numbers on the rear or bottom of the oven. This would require moving or tilting the oven for access.

Once you locate the model and serial numbers, you can typically find them on a sticker or metal plate. The model number is often labeled as “Model” or “Model No.,” and the serial number may be labeled as “Serial” or “Serial No.”

It’s a good idea to write down or take a picture of this information for future reference, as it may be needed when contacting the manufacturer, a repair technician, or when ordering replacement parts. Additionally, keep the owner’s manual in a safe place for easy reference in case you need to consult it for maintenance or troubleshooting information.


Q: Why doesn’t my oven cook properly?

A: If your oven doesn’t cook properly and consistently produces undercooked or unevenly cooked meals, it can be frustrating. Several factors can contribute to this issue, and diagnosing the exact cause may require some troubleshooting. Here are common reasons why an oven may not cook properly and how to address them:

Temperature Calibration Issues:

Oven temperature calibration can drift over time, leading to inaccurate temperature settings. Your oven may actually be cooler than the temperature displayed.
Solution: Use an oven thermometer to check the actual temperature inside your oven. If you find a significant discrepancy, you may need to recalibrate the oven or have it serviced by a professional technician.

Preheating:

Failing to preheat your oven properly can result in uneven cooking. If you place food in a cold oven or don’t wait for it to reach the desired temperature, the cooking process may be disrupted.
Solution: Ensure that you preheat your oven for the recommended amount of time stated in your recipe. This allows for even cooking.

Rack Position:

The placement of your cooking trays or dishes on the oven racks can affect how quickly food cooks. Placing food too close to the heating element can result in uneven cooking.
Solution: Adjust the rack position to ensure proper airflow and distance from the heating element. Follow the recommendations in your recipes or use the middle rack for more consistent results.

Cooking Time and Temperature Settings:

Incorrectly set cooking times or temperatures can lead to undercooked or overcooked dishes. Make sure you’re following the recipe instructions accurately.
Solution: Double-check your recipe’s recommended cooking time and temperature. Use a reliable oven timer or kitchen timer to avoid undercooking.

Oven Hot Spots:

Some ovens have hot spots, which are areas that heat up more than others. Placing food in these hot spots can result in uneven cooking.
Solution: To mitigate hot spots, you can rotate your dishes or use baking sheets with air cushions to create more even heat distribution.

Using the Wrong Cookware:

The type and material of cookware you use can impact cooking times and results. Some materials may conduct heat differently, affecting the cooking process.
Solution: Use cookware that is appropriate for the type of food you’re preparing and follow the recommendations in your recipes.

Cooking Technique:

Proper cooking techniques are crucial for achieving desired results. Using the wrong technique or not monitoring the cooking process can lead to undercooked dishes.
Solution: Pay attention to cooking methods and techniques, such as covering dishes or using a meat thermometer to gauge doneness accurately.

Oven Insulation or Seals:

If the oven is not properly insulated or if the door seals are damaged or worn, heat can escape, leading to uneven cooking.
Solution: Inspect the oven’s seals and insulation for any issues. If you find problems, consider replacing the seals or having the oven professionally serviced.

If you’ve tried these solutions and your oven still doesn’t cook properly, it’s advisable to consult a professional appliance technician to diagnose and address any underlying issues with your oven’s performance. Proper maintenance and regular oven cleaning can also help improve cooking results and extend the lifespan of your appliance.


Q: My oven overcooks my meals. Why?

A: If your oven consistently overcooks your meals, it can be frustrating and may indicate a problem with the oven’s temperature regulation or cooking settings. Here are some common reasons why your oven might be overcooking food and how to address them:

Incorrect Temperature Calibration:

Oven temperature calibration can drift over time, leading to inaccurate temperature settings. Your oven may actually be hotter than the temperature displayed.
Solution: Use an oven thermometer to check the actual temperature inside your oven. If you find a significant discrepancy, you may need to recalibrate the oven or have it serviced by a professional technician.

Preheating Time:

Failing to preheat your oven properly can result in uneven cooking. If you place food in a cold oven or don’t wait for it to reach the desired temperature, the cooking process may be disrupted.
Solution: Ensure that you preheat your oven for the recommended amount of time stated in your recipe. This allows for even cooking.

Rack Position:

The placement of your cooking trays or dishes on the oven racks can affect how quickly food cooks. Placing food too close to the heating element can result in overcooking.
Solution: Adjust the rack position to ensure proper airflow and distance from the heating element. Follow the recommendations in your recipes or use the middle rack for more consistent results.

Cooking Time and Temperature Settings:

Incorrectly set cooking times or temperatures can lead to overcooking. Make sure you’re following the recipe instructions accurately.
Solution: Double-check your recipe’s recommended cooking time and temperature. Use a reliable oven timer or kitchen timer to avoid overcooking.

Oven Hot Spots:

Some ovens have hot spots, which are areas that heat up more than others. Placing food in these hot spots can result in uneven cooking.
Solution: To mitigate hot spots, you can rotate your dishes or use baking sheets with air cushions to create more even heat distribution.

Oven Calibration or Repair:

If your oven consistently overcooks food even after checking the temperature calibration, there may be an issue with the thermostat or other internal components that require professional repair.
Solution: Contact an appliance technician to inspect and repair your oven if needed.

Using the Wrong Cookware:

The type and material of cookware you use can impact cooking times and results. Some materials may conduct heat differently, affecting the cooking process.
Solution: Use cookware that is appropriate for the type of food you’re preparing and follow the recommendations in your recipes.

Cooking Technique:

Overcooking can also result from a specific cooking technique or method. For example, leaving food uncovered for too long may cause it to dry out and overcook.
Solution: Pay attention to cooking methods and techniques, such as covering dishes or using a meat thermometer to gauge doneness accurately.

If you’ve tried these solutions and your oven continues to overcook your meals, it’s advisable to consult a professional appliance technician to diagnose and address any underlying issues with your oven’s performance.


Q: Why am I hearing popping noises from my oven?

A: Hearing popping or cracking noises from your oven can be concerning, but these sounds can have various causes, and not all of them necessarily indicate a problem. Here are some common reasons for popping noises in an oven:

Expansion and Contraction: Ovens are subjected to extreme temperature changes when heating and cooling. As the oven heats up, the metal components expand, and as it cools down, they contract. This can sometimes create popping or creaking sounds as the metal flexes. These sounds are usually normal and nothing to worry about.

Food or Grease Splatter: If you’ve recently cooked something that produced splatter or drips inside the oven, especially fatty or greasy foods, these can sometimes make popping or sizzling noises as they heat up or cook further. This is common and typically harmless.

Uneven Heating: If your oven has a convection fan, it can create airflow patterns that result in popping noises, especially when the fan turns on or off. This is also normal and doesn’t usually indicate a problem.

Drips on Heating Elements: If there are food particles or liquid drips on the oven’s heating elements (usually located at the top or bottom of the oven), they can make crackling or popping noises as they heat up and burn off.

Solution: If this is the cause, simply wait for the oven to cool down and then clean the heating elements to remove any residue.

Baking Stone or Pizza Stone: If you use a baking stone or pizza stone in your oven, it can sometimes make popping or cracking noises as it heats up and expands. This is generally normal.

Foreign Objects: Occasionally, small objects or debris may have fallen into the oven and are making noises as they heat up.

Solution: Turn off the oven, unplug it, and inspect the interior for any foreign objects or debris. Remove them if found.

Oven Liner or Insulation: Some ovens have liners or insulation materials that can expand and contract with temperature changes, creating noise. This is typically harmless.

If the popping noises are consistent and don’t seem related to normal heating and cooling cycles or food splatter, it’s a good idea to have your oven inspected by a professional technician. Unusual noises could be an indicator of a problem with a component such as the heating elements, the fan, or other internal parts. Regular maintenance and cleaning can also help prevent some of these issues and keep your oven operating smoothly.


Q: Why isn’t my oven turning on?

A: If your oven isn’t turning on, there could be several reasons for the issue. Here are some common troubleshooting steps to help you identify and potentially resolve the problem:

Check the Power Source:

Ensure the oven is properly plugged into the electrical outlet.
Check the circuit breaker or fuse box to make sure the circuit supplying power to the oven is not tripped or a fuse hasn’t blown. If it has, reset the breaker or replace the fuse.
Oven Control Panel:

Verify that the oven control panel is properly set to the desired cooking mode, temperature, and timer settings.
If your oven has a delay start feature, make sure it’s not set to start later.
Safety Interlock Features:

Most ovens have safety interlock features that prevent the oven from turning on if the door is not properly closed. Ensure the oven door is securely closed and latched.
Time Delay Function:

Some ovens have a time delay function that allows you to set a delayed start time. Check if this feature is activated, and if so, wait until the programmed start time.
Oven Light:

If the oven light is not working when you open the door, this may indicate a power issue. If the light doesn’t turn on, it’s possible that the oven isn’t receiving power.
Control Lock Feature:

Some ovens have a control lock feature that disables the control panel to prevent accidental changes. Check your oven’s manual for instructions on how to unlock the controls.
Faulty Thermostat or Temperature Sensor:

If the oven seems to be getting power but doesn’t heat up, it could be due to a malfunctioning thermostat or temperature sensor. This may require professional diagnosis and repair.
Professional Service:

If you’ve checked all of the above and your oven still isn’t turning on, it may have a more serious electrical or mechanical issue. In such cases, it’s best to contact a qualified appliance technician to inspect and repair the oven.
Remember to prioritize safety when troubleshooting your oven. If you’re unsure about any of the steps or if there’s any risk of electrical shock, it’s best to turn off the power to the oven and consult a professional technician for assistance. Additionally, consult your oven’s user manual for specific troubleshooting steps and safety guidelines, as oven designs and features can vary.


Q: Why does my oven’s fan make noises?

A: A noisy oven fan can be caused by a variety of factors, and diagnosing the exact problem will depend on the type and model of your oven. Here are some common reasons why an oven’s fan might make noises:

Foreign Object: Sometimes, small objects or debris can get lodged in the fan blades or housing. This can cause a clicking or rattling noise as the fan rotates.

Solution: Turn off the oven, unplug it, and carefully inspect the fan area. If you find any foreign objects, carefully remove them. Ensure the oven is unplugged during this process for safety.

Worn or Damaged Fan Motor Bearings: Over time, the bearings in the fan motor can wear out or become damaged, leading to a humming, squeaking, or grinding noise.

Solution: You may need to replace the fan motor or have it serviced by a professional technician.

Fan Blade Issues: Bent or damaged fan blades can cause the fan to make unusual noises as it spins.

Solution: Examine the fan blades for any visible damage. If you notice any, you may need to replace the fan blades.

Fan Motor Mounting Screws: Loose or improperly tightened screws holding the fan motor in place can lead to vibrations and noise.

Solution: Check the screws securing the fan motor to the oven’s housing. Tighten any loose screws as needed.

Oven Temperature Variations: Some ovens have convection fans that automatically adjust their speed to maintain a consistent temperature. As they cycle on and off, you may hear changes in fan noise.

Solution: This is usually normal operation for convection ovens. You can consult your oven’s manual to learn more about its specific fan operation.

Age and Wear: As ovens age, components, including the fan, may wear out, leading to increased noise levels.

Solution: Regular maintenance and, if necessary, professional servicing can help prolong the life of your oven and reduce noise issues.

Fan Blade Balance: If the fan blades are not balanced correctly, it can result in vibrations and noise.

Solution: Balancing the fan blades may require professional adjustment or replacement.

If you’re not comfortable diagnosing or addressing the issue yourself, it’s advisable to contact a professional appliance technician. They can inspect your oven, identify the specific problem, and perform any necessary repairs or replacements to ensure your oven fan operates quietly and efficiently. Additionally, always prioritize safety by unplugging the oven or turning off its power source before attempting any maintenance or repairs.


Q: How do I clean my oven properly?

A: Cleaning your oven properly can help maintain its efficiency and prevent unpleasant odors. Here’s a step-by-step guide on how to clean your oven:

Materials You’ll Need:

Oven cleaner (commercial or homemade)
Baking soda
White vinegar
Dish soap
Water
Rubber gloves
Scrubbing sponge or scouring pad
Oven-safe container (for homemade cleaning solution)
Plastic or newspaper (to protect your floor)
Safety Precautions:

Ensure the oven is completely cool before starting the cleaning process to avoid burns.
Wear rubber gloves to protect your hands from chemicals and grease.
Open windows or turn on the exhaust fan for ventilation.
Step-by-Step Cleaning Process:

Remove oven racks: Take out the oven racks and any other removable parts such as baking sheets or trays.

Prep the oven: Lay down plastic or newspaper on the floor beneath the oven to catch any drips or spills during cleaning.

Scrape off loose debris: Use a plastic or wooden spatula to gently scrape off any loose crumbs or food residue from the oven’s interior. Be careful not to scratch the surfaces.

Apply the cleaning solution:

Commercial oven cleaner: Follow the manufacturer’s instructions for the specific product you’re using. Typically, you’ll spray or apply the cleaner evenly on the interior surfaces of the oven, including the walls, floor, and ceiling. Avoid spraying the heating elements if your oven has them.
Homemade cleaning solution: Mix a paste of baking soda and water (roughly 1/2 cup of baking soda and a few tablespoons of water) to create a thick paste. Spread this paste over the interior surfaces of the oven. For stubborn stains, you can also spray or dab white vinegar onto the baking soda paste.
Let it sit: Allow the cleaning solution to sit for a few hours or overnight. This will help break down grease and grime.

Scrub and wipe: Use a scrubbing sponge or scouring pad to scrub the oven’s interior surfaces. For stubborn stains, you may need to use a little more elbow grease. If using a commercial oven cleaner, follow the instructions regarding scrubbing.

Rinse: Wipe down the interior of the oven with a damp cloth or sponge to remove any remaining cleaning solution or residue.

Clean the oven racks and trays: Wash the oven racks and any other removable parts in the sink with warm, soapy water. Use a scrubbing brush or scouring pad to remove grease and grime. Rinse thoroughly and allow them to dry completely before placing them back in the oven.

Replace the oven racks: Once everything is clean and dry, replace the oven racks and any other parts you removed.

Final touch: To eliminate any remaining odors, preheat the oven to a low temperature (around 200°F or 90°C) for about 15-20 minutes. This will help burn off any residual cleaning smells.

Remember to consult your oven’s user manual for any specific cleaning recommendations from the manufacturer. Cleaning your oven regularly, ideally before it becomes heavily soiled, can make the process more manageable and prevent the need for harsh chemicals.


Q: My oven smells bad. Why?

A: A bad smell coming from your oven can be unpleasant and concerning. There are several potential reasons for a bad odor emanating from your oven, and here are some common ones and how to address them:

Food spills or residues: Over time, food particles or spills can accumulate on the oven’s interior surfaces, such as the oven floor or walls. These can burn and create unpleasant odors when the oven is heated.

Solution: Clean your oven thoroughly. Remove any visible food debris or spills, and consider using an oven cleaner or a mixture of baking soda and water to clean the interior. Make sure to follow the manufacturer’s instructions for cleaning your specific oven model.

Leftover spills on oven racks or trays: Oven racks, baking sheets, and trays can also collect food residue and oils, which can produce unpleasant smells when heated.

Solution: Remove the oven racks and trays and clean them separately using dish soap and water or an oven-safe cleaner.

Burnt-on food: If you’ve recently burned a dish in your oven, the smell may linger for a while.

Solution: Ventilate your kitchen by opening windows and turning on the exhaust fan to help dissipate the odor. Clean the oven as mentioned above to remove any burnt remnants.

Self-cleaning cycle: If you’ve recently run a self-cleaning cycle in your oven, it’s common for a strong odor to linger for a while afterward. This can be caused by burning off food residues and grease.

Solution: Allow the oven to cool down and ventilate your kitchen. The smell should dissipate after some time.

Gas oven issues: If you have a gas oven and notice a bad smell, it could be due to a gas leak or a malfunction.

Solution: If you suspect a gas leak, turn off the gas supply to the oven immediately, open windows for ventilation, and contact a professional technician to inspect and repair the oven.

Electrical issues: An electrical malfunction within the oven can sometimes produce unusual smells.

Solution: If you suspect an electrical problem, it’s crucial to unplug the oven and contact a qualified appliance repair technician.

If the bad smell persists despite trying these solutions, it’s advisable to seek professional help, especially if you suspect a gas leak or an electrical issue. Regular cleaning and maintenance can help prevent odors from accumulating in your oven in the future.


Q: Why does smoke come out of my oven at high temperatures?

A: Smoke coming out of your oven at high temperatures can be caused by several factors, and it’s important to address this issue promptly as it may indicate a problem with your oven. Here are some common reasons why smoke might be coming out of your oven:

Residual Food or Grease: One of the most common reasons for smoke in the oven is the presence of leftover food debris or grease from previous cooking sessions. When the oven heats up, these residues can burn, producing smoke. Cleaning the oven’s interior, including the oven racks and walls, can help eliminate this issue.

Spills and Drips: Spills or drips of food or liquids onto the oven’s heating elements or interior surfaces can result in smoke when the oven is heated. Remove any visible spills or debris to prevent further smoking.

Self-Cleaning Mode: If you’re using the oven’s self-cleaning mode, it can heat the oven to extremely high temperatures to burn off food residue. During this process, any leftover food particles or grease may produce smoke. This is normal during self-cleaning cycles, but ensure proper ventilation by opening windows or using an exhaust fan.

Residue on Oven Racks or Pans: Smoke can also be caused by residue on the oven racks or baking pans placed inside the oven. Ensure that oven racks and cookware are clean and free from food remnants or grease before using them in high-temperature settings.

Improperly Positioned Oven Racks: Placing oven racks too close to the heating element at the top of the oven can lead to excess browning or even burning of food, resulting in smoke. Adjust the rack position as needed to prevent food from getting too close to the heat source.

Excessive Oil or Fat: Cooking dishes with a high-fat content, like certain meats or fatty foods, can produce excess smoke if the fat or oil drips onto the oven’s heating elements. Try using a drip pan or roasting rack to catch excess fats.

Burning Oven Residue: Sometimes, smoke may be due to the presence of residual manufacturing oils or coatings on the oven’s heating elements or interior surfaces. Running a high-temperature cycle with the oven empty (e.g., at 450°F or higher) for an hour or so can help burn off any remaining residues.

Faulty Oven Components: If none of the above solutions resolve the issue, there may be a problem with the oven’s heating elements, temperature sensors, or other components. These issues can lead to uneven heating or excessive heat, causing food or debris to burn and produce smoke. In such cases, it’s advisable to have a professional technician inspect and repair the oven.

If smoke persists despite trying these solutions, or if you suspect a more serious issue with your oven’s operation, it’s best to discontinue use and seek professional service to ensure safety and proper functionality. Smoking ovens can pose a fire hazard, so addressing the problem promptly is essential.


Q: How can I maintain my oven?

A: Maintaining your oven is essential for ensuring it functions efficiently, cooks food evenly, and operates safely. Regular maintenance can also prolong the appliance’s lifespan. Here are some tips on how to maintain your oven:

Clean Regularly:

Interior: Wipe down the interior of the oven, including the oven racks, after each use to remove spills, food residue, and grease. You can use a damp cloth, sponge, or oven cleaner designed for your oven’s type (self-cleaning or standard).
Oven Racks: Remove and clean the oven racks separately. Soak them in warm, soapy water to loosen stubborn grime, then scrub with a non-abrasive brush or sponge. Some oven racks are dishwasher-safe.
Door and Window: Clean the oven door and window regularly to remove any accumulated grease or stains. Use a suitable glass cleaner or a mixture of water and vinegar for this purpose.
Self-Cleaning Mode (If Available):

If your oven has a self-cleaning feature, use it periodically. This function heats the oven to high temperatures, which burn off food residue. Follow your oven’s user manual for specific instructions on using the self-cleaning mode.
Vent and Exhaust:

Keep the oven’s vent and exhaust area clean and free of obstructions to ensure proper ventilation. Blocked vents can affect cooking performance and safety.
Replace Oven Light Bulb:

If the oven light bulb burns out, replace it promptly to ensure you can monitor your cooking without opening the oven door.
Check and Calibrate Temperature:

Periodically verify your oven’s temperature accuracy by using an oven thermometer. If you notice significant temperature discrepancies, you may need to have your oven calibrated or repaired by a technician.
Seals and Gaskets:

Inspect the oven door gasket (the rubber or fiberglass seal around the oven door) for any signs of wear, damage, or gaps. A damaged gasket can affect heat retention and efficiency. If it’s damaged, replace it as needed.
Drip Pans and Broiler Pans:

Clean drip pans and broiler pans thoroughly after use to prevent the buildup of grease and food residue. These pans can become fire hazards if they accumulate excessive grease.
Vent Filters (Range Hood):

If your oven is part of a range with a vent hood, clean or replace the hood’s filters as needed. Grease filters can become clogged and reduce ventilation efficiency.
Maintenance Schedule:

Create a regular maintenance schedule to ensure that you clean and inspect your oven at appropriate intervals. Frequency may vary depending on how often you use your oven, but a good rule of thumb is to clean it after significant spills or at least every few months.
Professional Servicing:

If you encounter issues with your oven, such as error codes, heating problems, or unusual noises, consult your oven’s user manual for troubleshooting tips. If issues persist, it’s best to contact a professional technician for diagnosis and repair.
By following these maintenance tips, you can keep your oven in good working condition, maintain cooking efficiency, and ensure safe operation for years to come.